Get an Extra 30% off Clearance Items With Code SAVE30 (click here)
PC Guides - Hardline Tubing: Bending, Cutting and Installation
December 27, 2021 8
Welcome back, water coolers! In our last installment, we covered the process of measuring your system and planning out the layout of a rigid-tubing water cooling system.
That meticulous measuring and planning is going to pay off today. Today’s post is about the next step – the actual hands-on creation of the tubing that you need to make your new loop.
We’ll go over the entire process, from your choice of materials to forming that material into the shapes you need to the installation of that last beautiful piece of one-of-a-kind tube.
First-time rigid-tube workers: congratulations! With patience and the right tools your new creation will turn out to be something to show off.
More experienced benders, hopefully you’ll be able to pick up something useful today as well.
Addendum
Before we dive into the making process, I want to add a couple of things regarding measurement that didn’t make it into the last post. The first two are basic and should have been in that post – they’ve been added now. The third is a very handy tool that I came up with during the building of this system. I wish I’d had it years ago.
1 – How to measure your distances
When you’re measuring your tubing runs there are a couple of ways of handling the ends of the tubes (start and finish both).
![]()
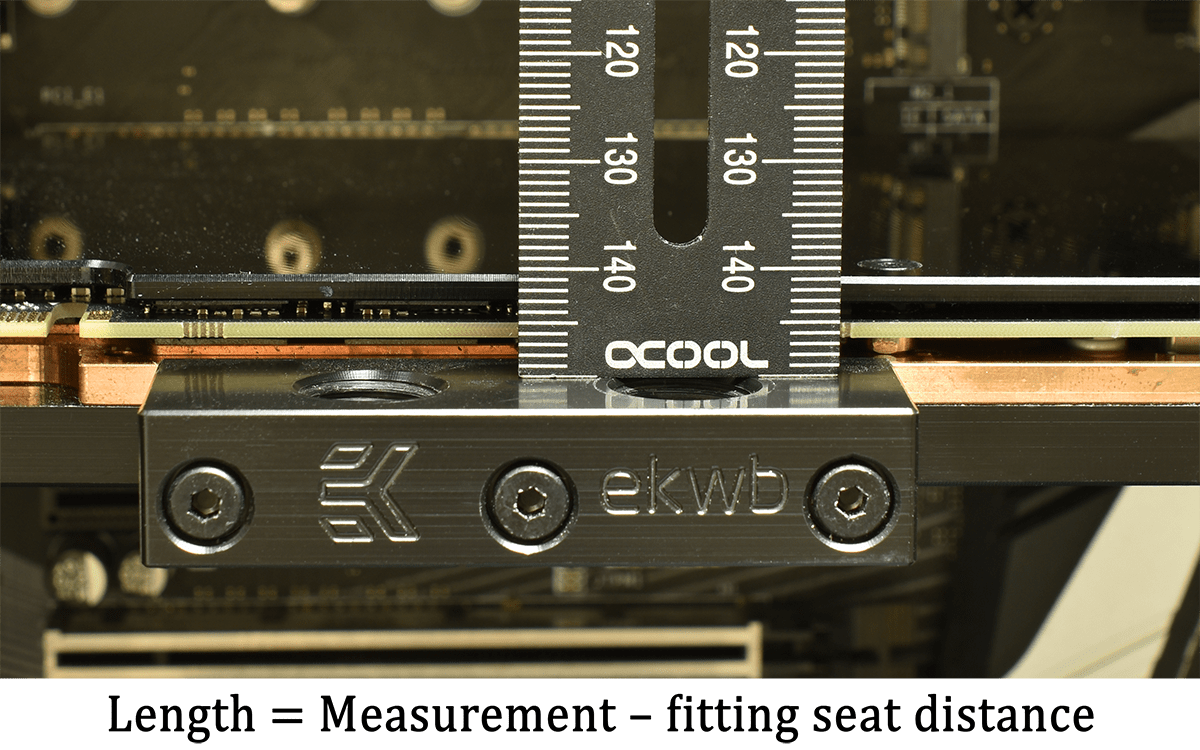
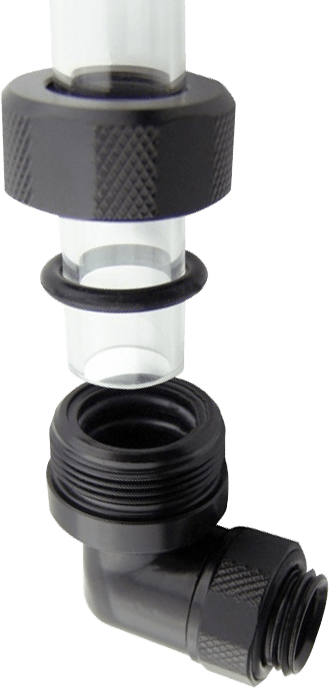
You can measure to the port itself. This refers to the port where the hard-tube fitting will go. It may be in a component or another fitting – just wherever you plan to install the fitting that holds the end of the tube.
This will make your end result over long since you measured past the point where the tubing will end. You’ll need to subtract the distance from the seat of the fitting (where the tubing stops on insertion) to the o-ring on the fitting.
![]()
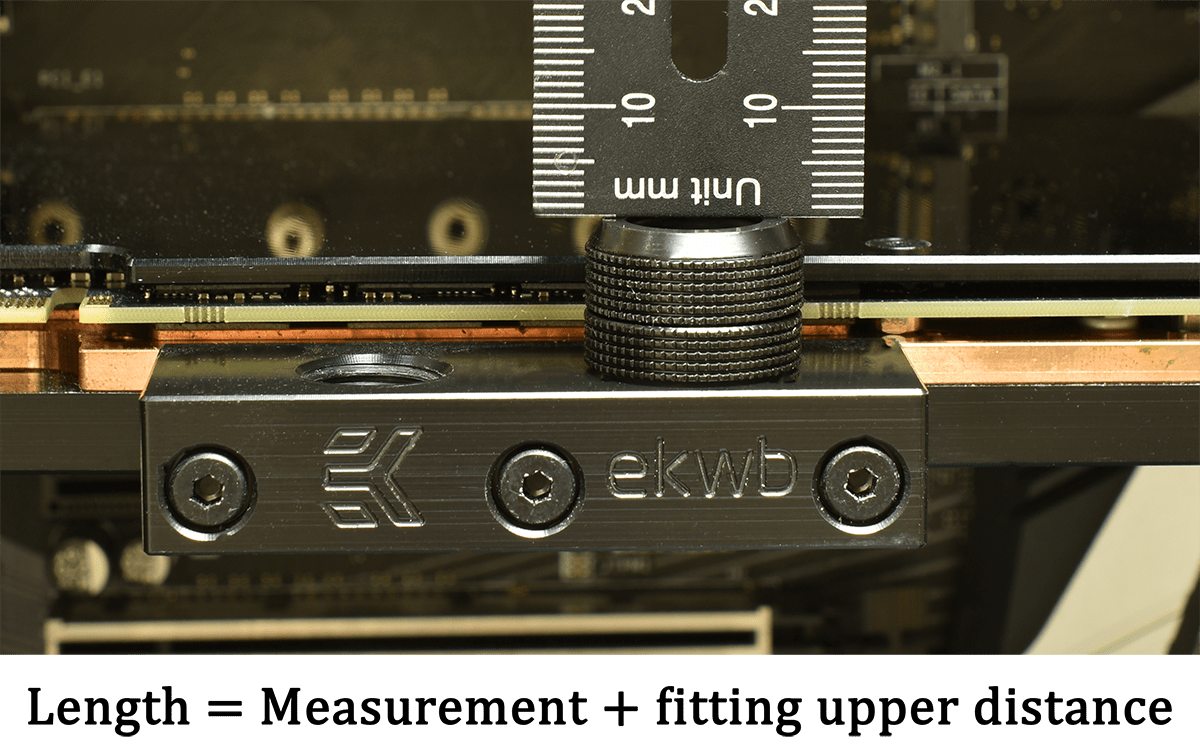
You can measure to the top of a fitting. You can do this with the cap on the fitting or off.
This will make your end result short since you stopped measuring before the point where the tube will end. You’ll need to add the distance from the surface you measured to the seat of the fitting.
Either of these is perfectly fine, but whichever you use, be consistent. Mixing two types of measurement make mistakes a lot easier.
2 - Measuring to a common reference point
Sometimes you need to make a measurement between two points that aren’t on the same two-dimensional plane. To help understand what that means, take a look at the images below.
![]()
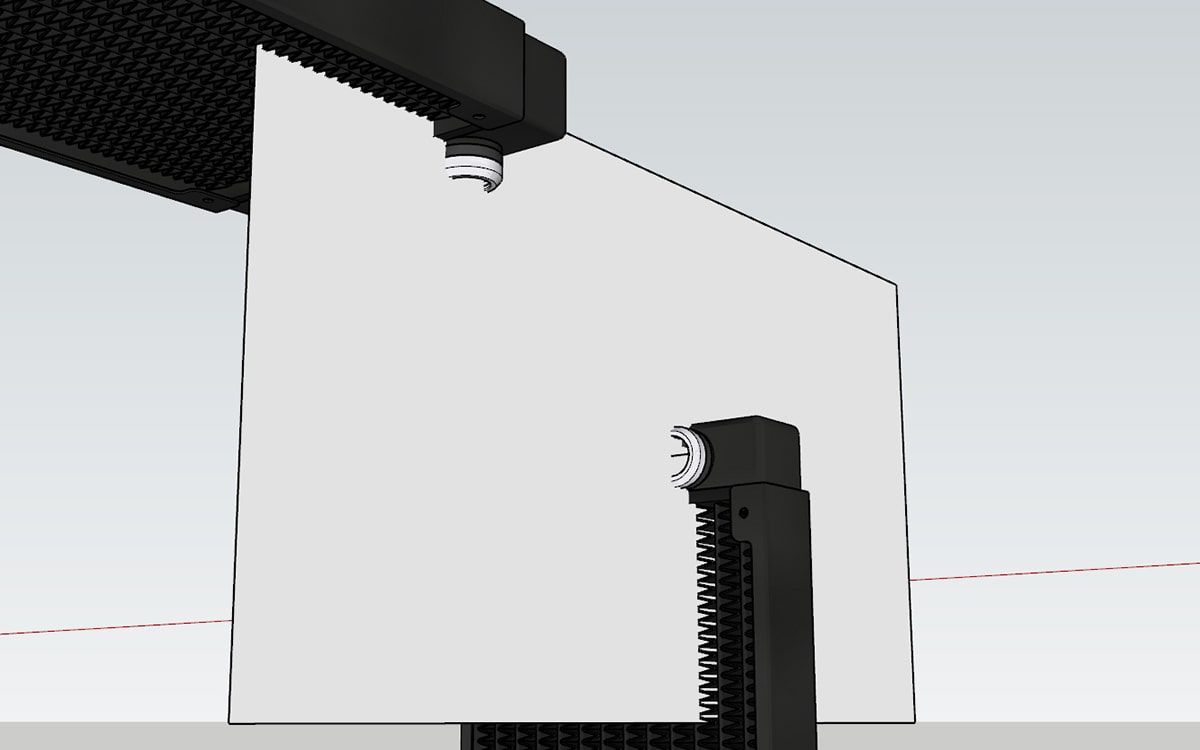
In this image, the ports on the two radiators are in the same plane, making them easy to measure between.
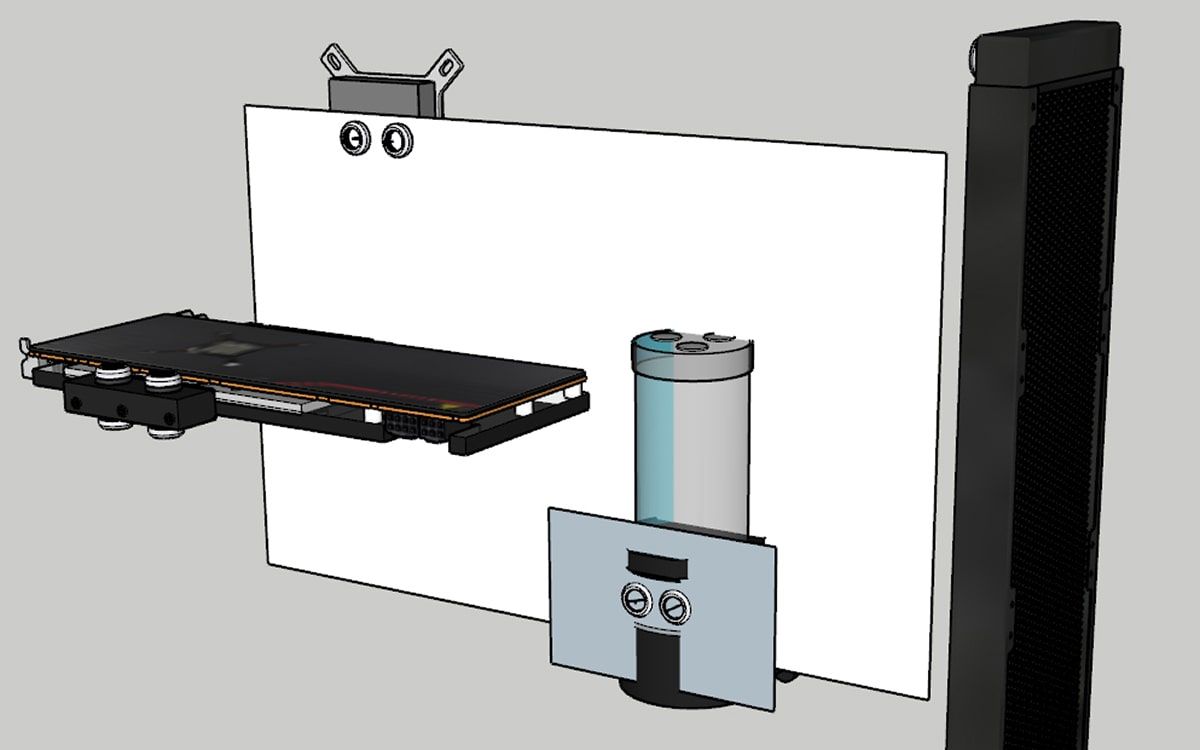
In this image, the ports on the CPU block and pump/reservoir are in different planes, adding a level of complication in getting an accurate measurement.
In the loop I’m making for this post, I needed the hertical distance between the inlet port on my CPU block and the outlet port on my pump to plan one of my bends. Those ports are separated both horizontally and vertically.
This is a tricky measurement to make the traditional way. You can hold multiple rulers in place and try to keep them all at 90 degrees to each other while you read the measurements, but there is a lot of room for error.
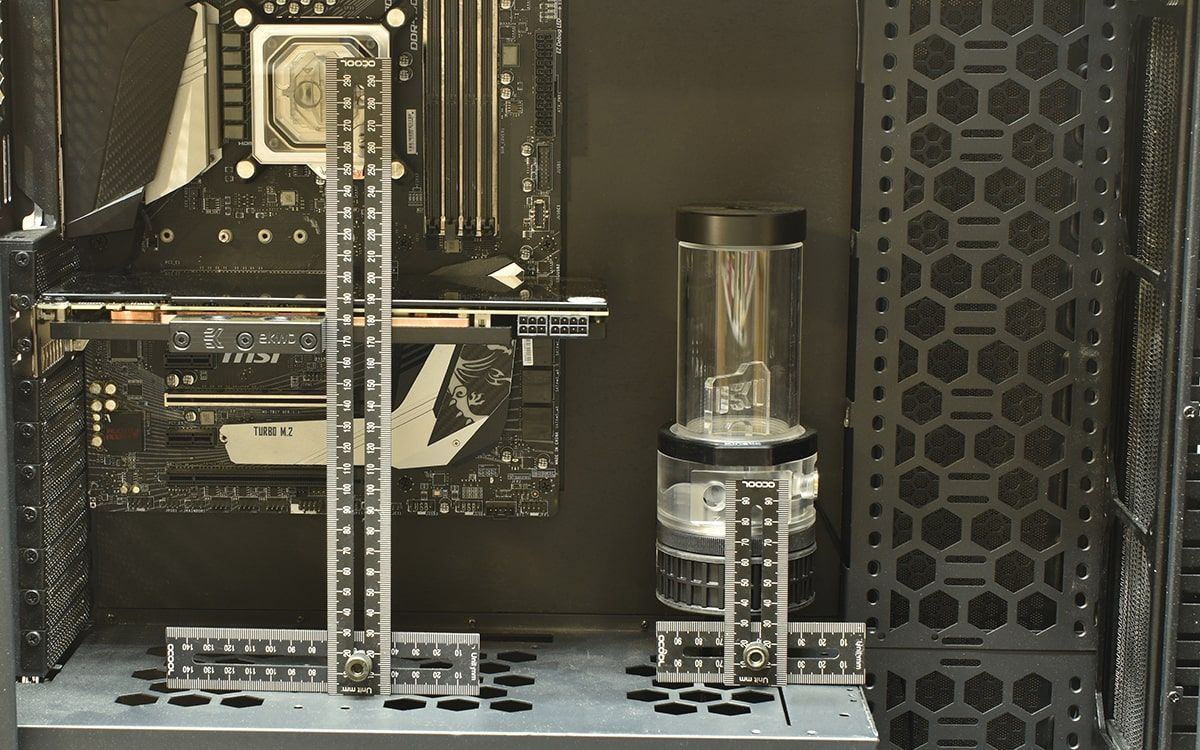
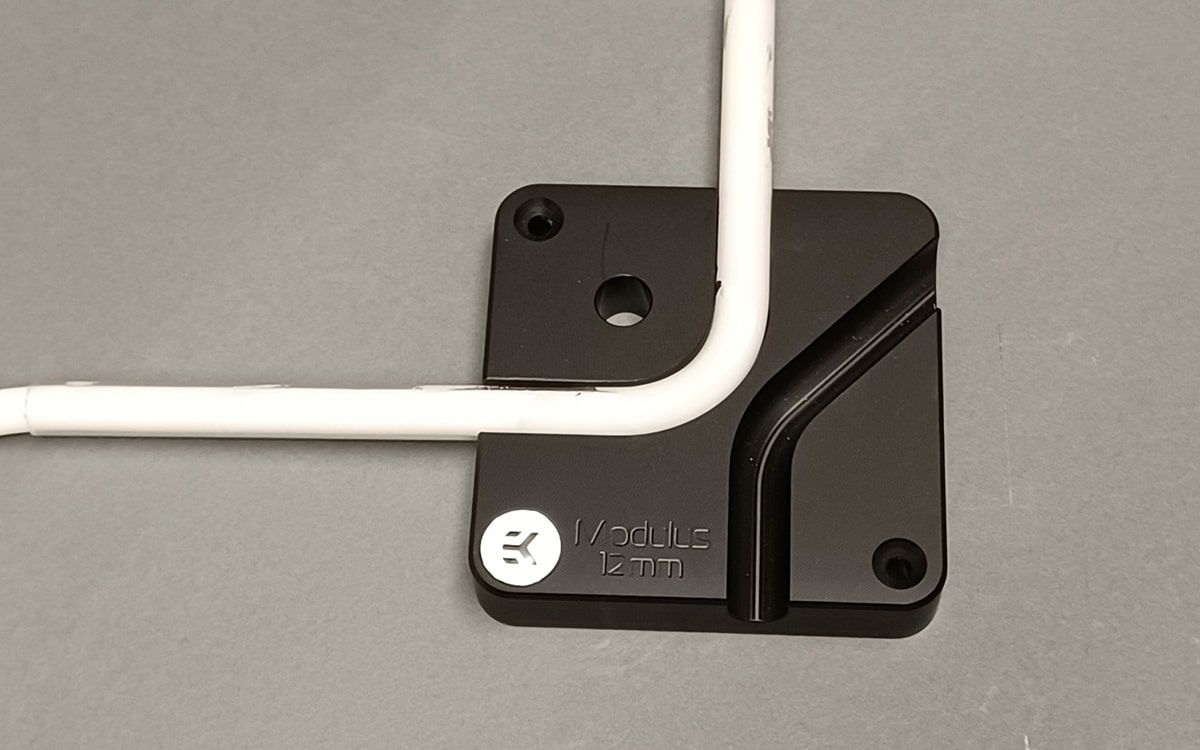
![]()
In this case I was able to measure the distance from both of these ports to a common point of reference.
I Measured the distance from each port to the power supply cover – a fixed horizontal reference point.
Subtracting the smaller measurement from the larger one gave me the exact measurement between those two points on the vertical plane.
You can do this with any two points that have a common reference point. The back panel of the case is a good one, of the power supply cover if you have one – anything that you can measure to in the same plane from both parts.
3 - A new tool
Not all of your parts will be positioned in a way that lets you use common-reference measurement. I was using the Alphacool measuring kit for these. While this is an excellent tool and a bargain for its price, I did have some problems holding one ruler at a specific point on a port in my loop while manipulating the other rulers to get square and angled measurements.
It would be a much more useful tool if it came with a way to hold the rulers in position at a fitting. When I realized how useful that would be, I decided to make one.
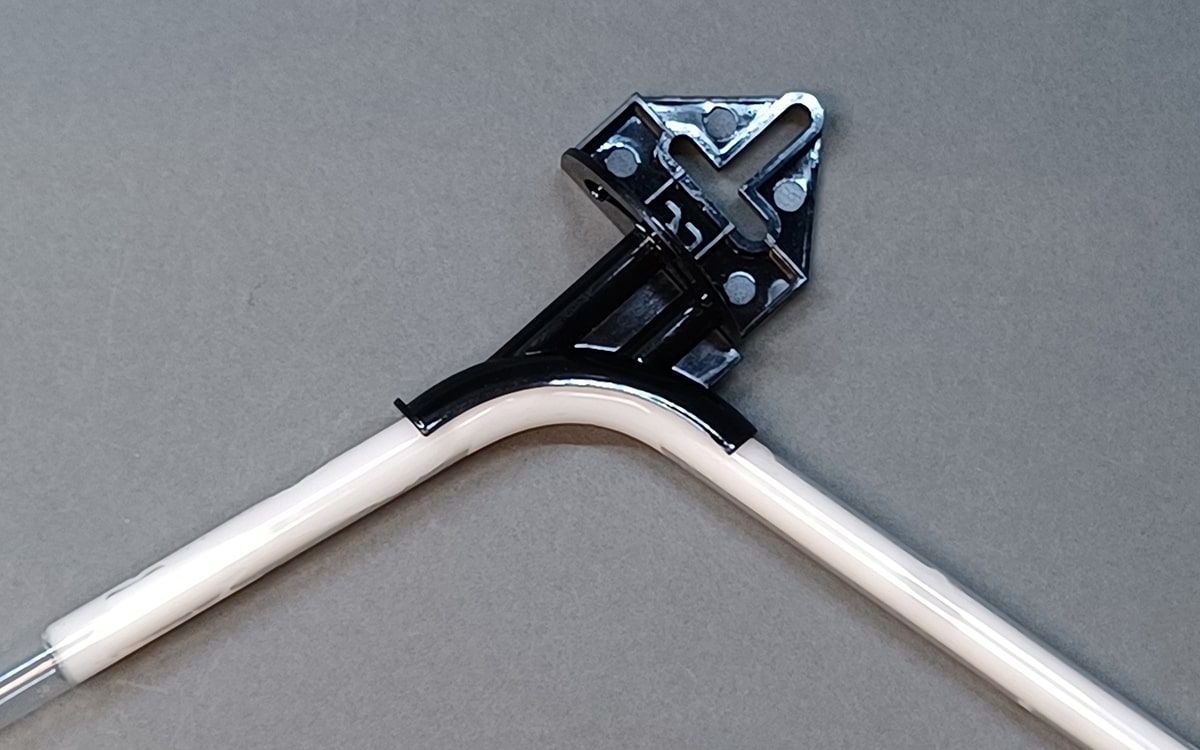
I’m using 12mm tubing in this build. I purchased a piece of aluminum rod 12mm in diameter and cut it into several short pieces. After measuring the inside depth of the fitting (how much tubing is inside it at full insertion – 10mm in my case), I cut a slot on one end of these small pieces deep enough that the solid uncut piece was 10mm long.
I then drilled a hole through both sides of the slot, tapped the holes to M4 thread and put short set screws in each side.
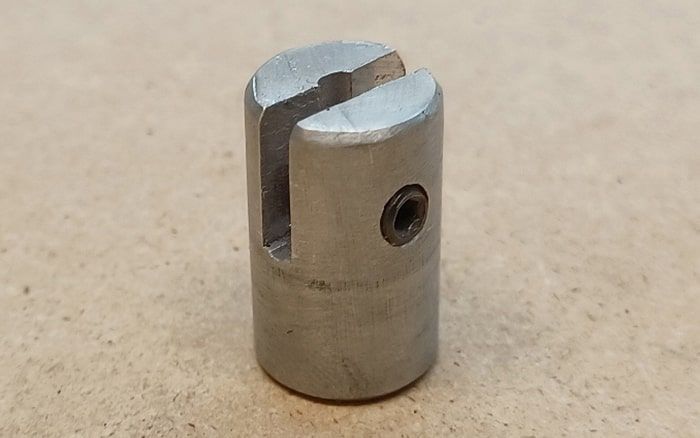
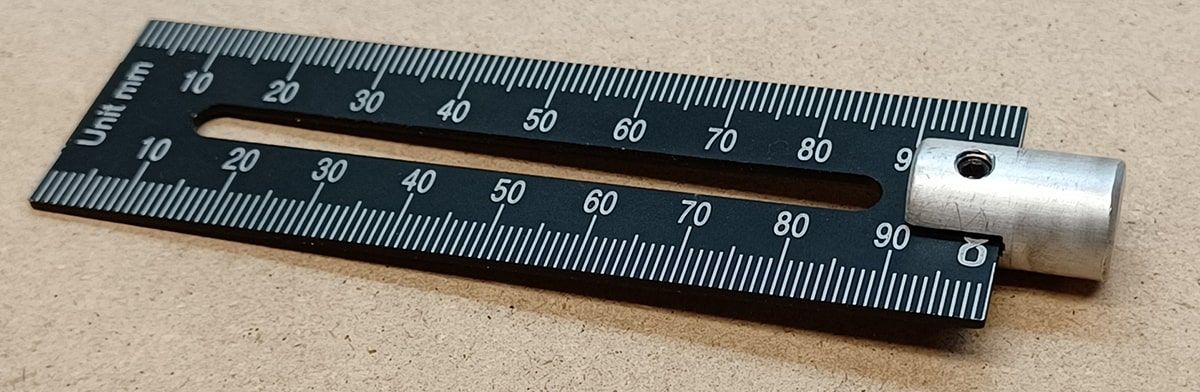
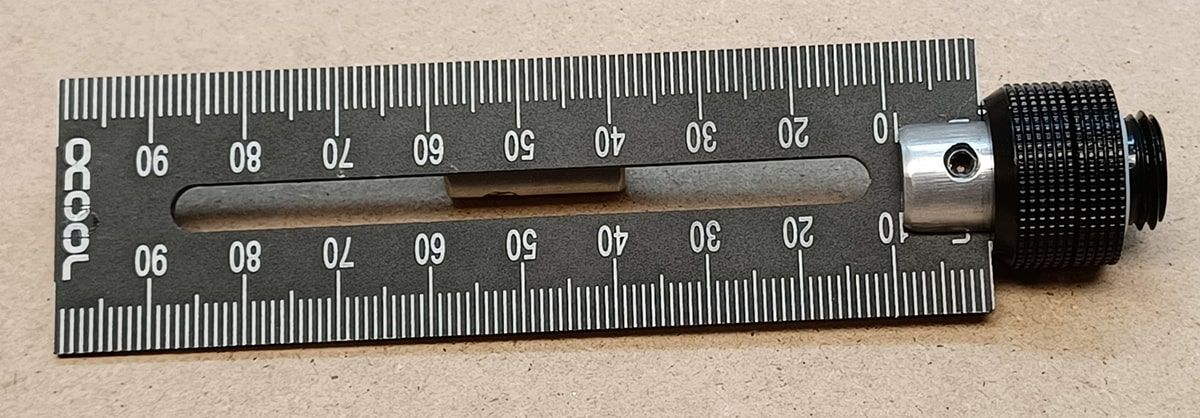
Now I had a way to hold the ruler at the fitting while I worked with the others. I could even slide the ruler sideways in the slot so that the edge of the ruler was marking the side of the tube or the center.

![]()
This turned out to be a HUGE time saver in the measuring process. The rulers not only stay in place but if you raise them slightly in the slot they can pivot to measure angles.
I made mine out of aluminum rod but you could do the same thing with a piece of ½” hardwood dowel with a little sanding and a small wood screw instead of a tap.
Enough on the measuring, let’s get to the tubing!
Materials
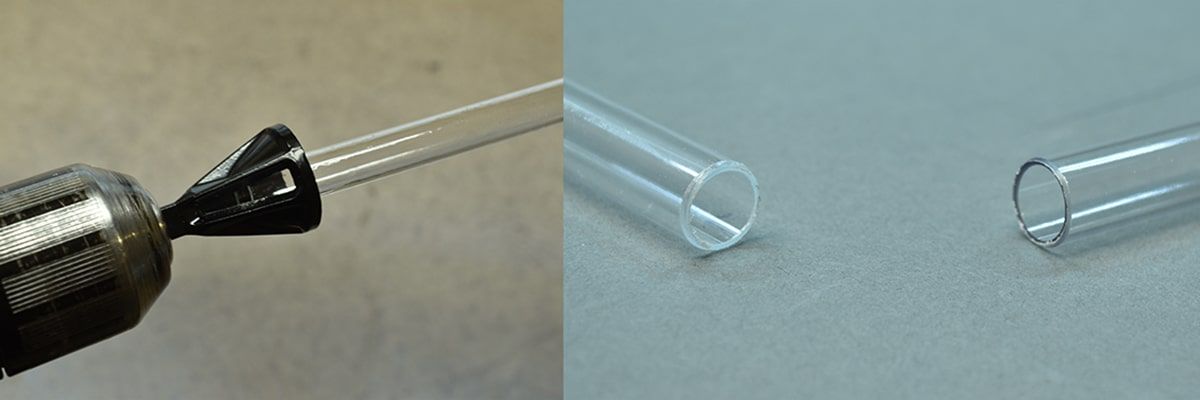
I’ll be working with two different types of tubing today – acrylic and PETG. These two materials probably make up 95% of the rigid-tubing systems you’ll see, and the methods used for working with both are nearly identical. (That “nearly” is important!)
For this project I chose 12mm acrylic tubing from Corsair and 12mm PETG tubing from Bitspower.
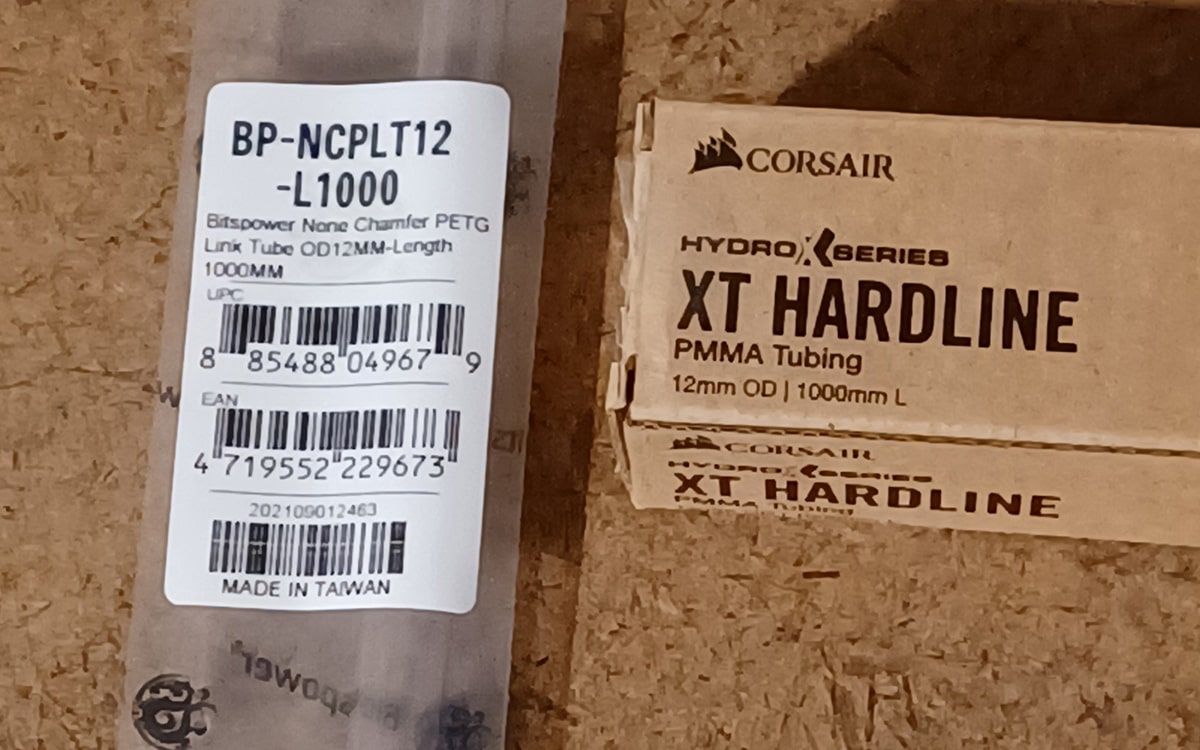
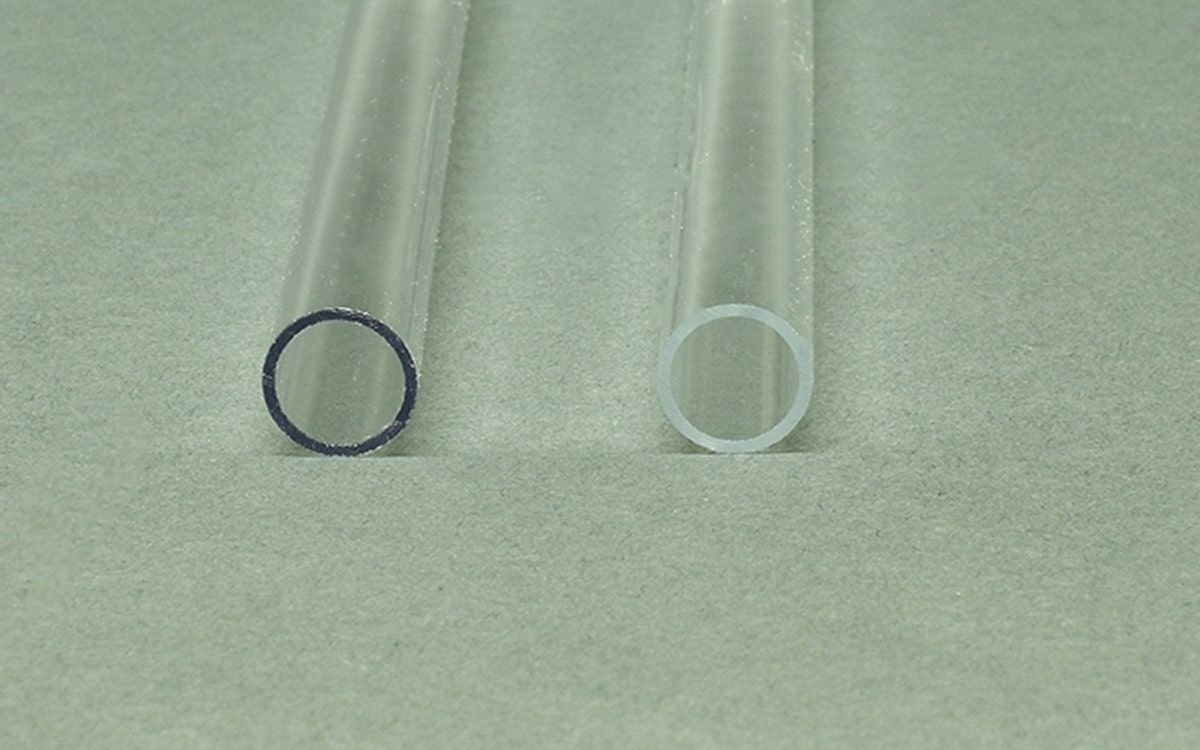
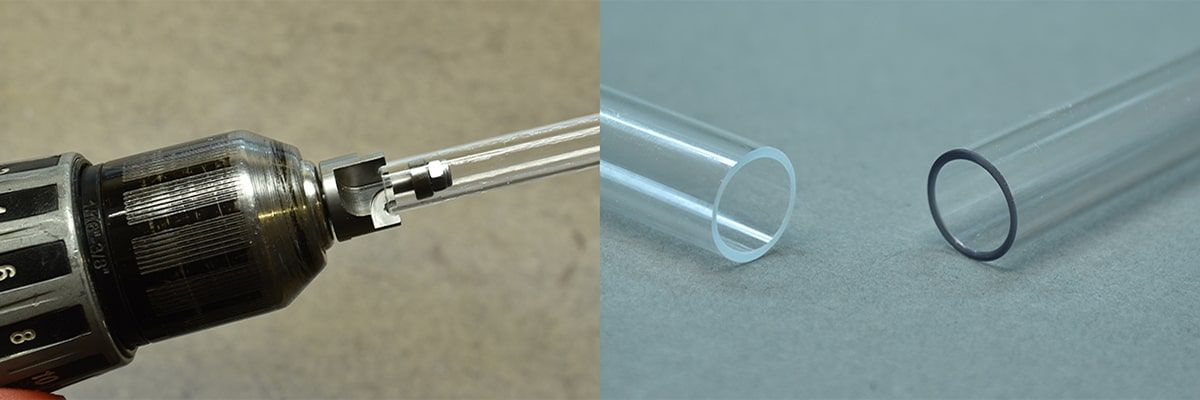
If you ever need to separate acrylic from PETG tubing, look at the cut ends. PETG will show a darker ring there than acrylic.
I checked the wall thickness and outside diameters of each type of tubing.
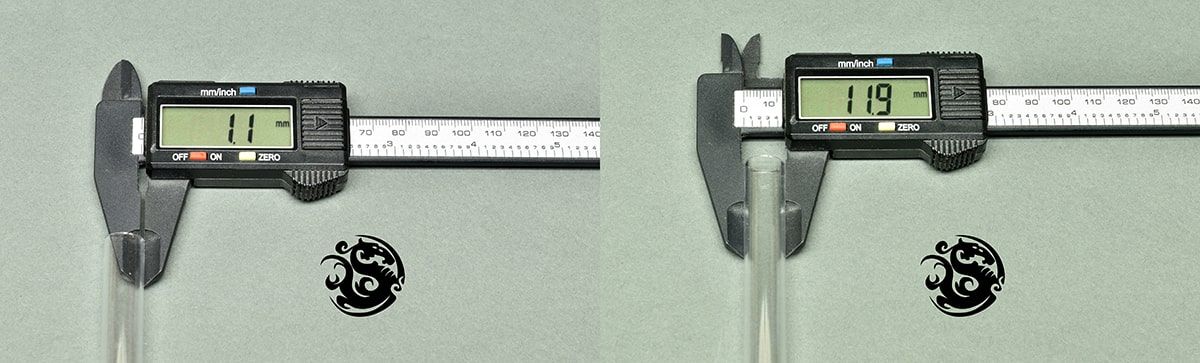
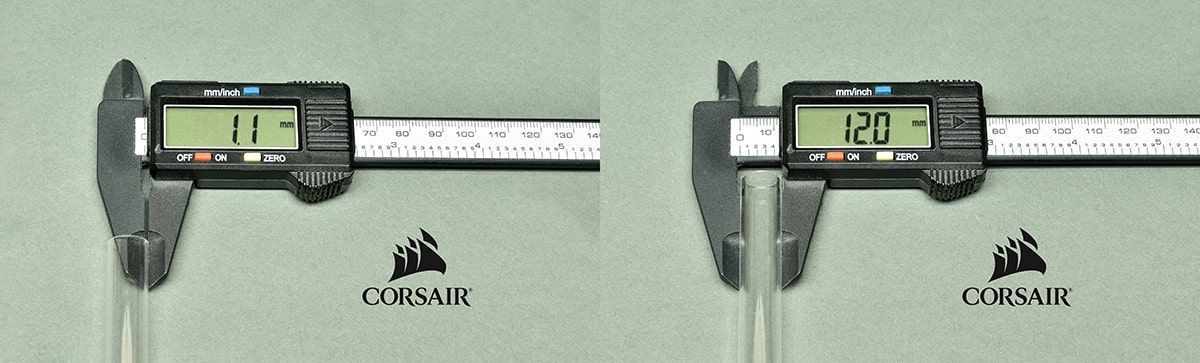
The differences between the tube are small enough for us to ignore for what we’re doing. Remember that with this kind of tube, 12mm isn’t always exactly 12mm and that’s fine. The variances we’re seeing here won’t be an issue for our use.
While acrylic and PETG may look nearly identical, they have some very different properties that you should know before working with them.

Cost
More for less. Depending on the brand and supplier, PETG can cost as much as 40% less than acrylic.
Winner: PETG

Clarity
The more clear your tubing is, the better your system will look as a whole, whether you’re trying to show off your coolant or the system behind it. Acrylic is the top contender here. Even glass can’t match acrylic for light transmission.
Winner: Acrylic

Rigidity
A rigid tube will hold its shape better once it’s formed, but won’t let you flex it nearly as much for installation in tight spaces.
Winner: Tie

Brittleness
PETG is far less brittle than acrylic, allowing it to be cut with simpler tools and flexed if needed during installation.
Winner: PETG

Melting Point
PETG has a lower melting point than acrylic. This makes it easier to bend, but it can also allow the tube to deform in a high-temperature loop. If you do end up using PETG tubing, it’s always a good idea to use PETG inserts to prevent deformation of the tube inside the fittings.
Winner: Tie

Chemical Stability
Acrylic is much more resistant to chemical reaction than PETG. Glycol-based coolants should not be used with PETG for this reason.
Winner: Acrylic

Stain Resistance
Its density and chemical stability make acrylic more stain resistant than PETG.
Winner: Acrylic

Scratch Resistance
That same density and hardness also makes acrylic more resistant to scratches than PETG.
Winner: Acrylic
So which one should you use? That really depends on your needs.
For ease of use, PETG is the better choice. It requires a much lighter touch when it comes to bending it, but when you learn that touch it’s a more forgiving material. I managed to re-bend a 90-degree bend to point in entirely the other direction with no distortion at all. That would be very hard to do with acrylic.
For durability and appearance acrylic is clearly ahead. It’s clarity and scratch resistance make it one of the most beautiful materials to work with, especially if you’re into custom lighting.
To be clear: the basic process is the same between the two materials, but the difference in the melting points makes working with PETG and acrylic different.
If you try to heat and bend PETG the way you do acrylic you’re going to end up with a ruined mess.
Likewise if you try to bend acrylic after heating it like you would PETG, you’ll end up with a different-looking but equally useless mess.
How to work with each will come with experience. Buy extra material and enjoy ruining it as you learn the right way to work with it.
I’ll repeat my previous advice here: tubing is cheap – practice is priceless.
How To Use It
The process of creating a rigid-tubing system starts with planning, then measuring. I did that in my last post (and added a little bit today), so I have a solid plan for tube routing and all of the measurements I need for each piece.
The process of actually making the tubing should be done in sequence: bend, cut, chamfer.
Bending
Why do we bend before we cut? We want each of our pieces of tubing to be longer than actually need it when we’re done making it. The runs between the bends and the bends themselves need to be exactly right, but each end should be longer than needed so we can cut down to exact length. It’s just one less measurement to have to worry about right now.
Unless a run I need to make is especially short, I’ll usually use a full piece of tubing for each piece I need to make for my loop. Tubing is one of the least expensive things we’ll buy for our water cooling system, and having the extra length is handy.
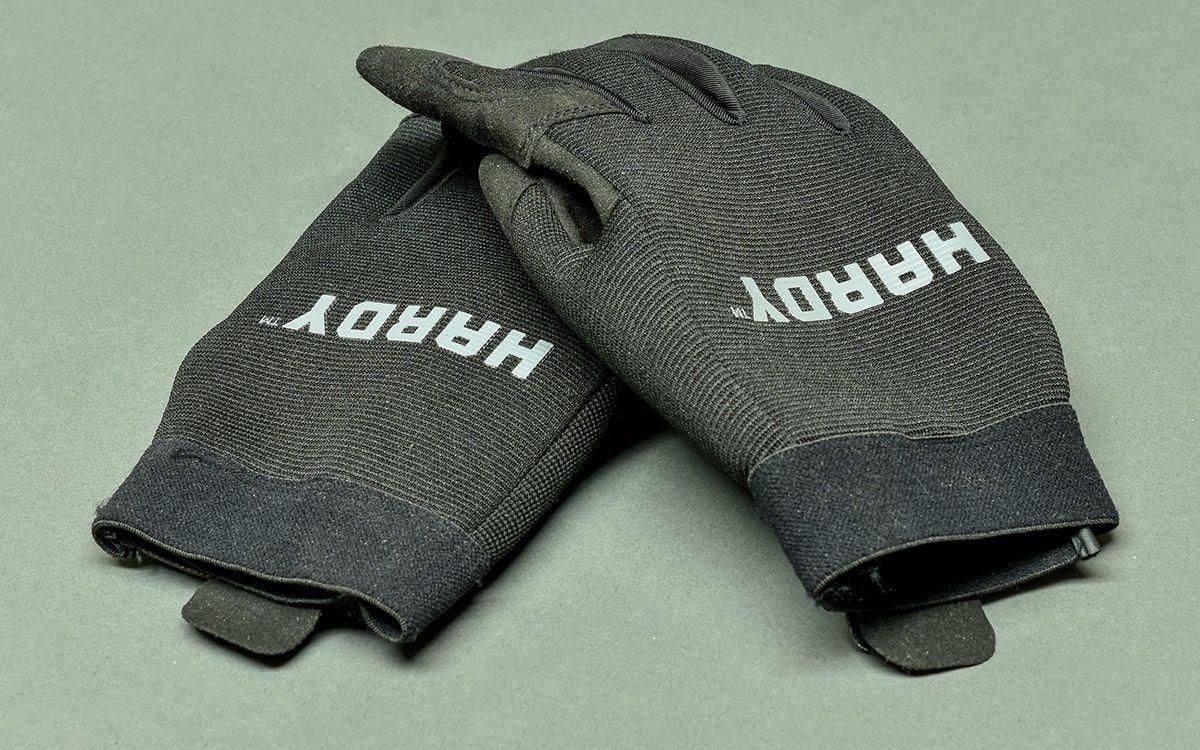
Safety
For the actual bending process you’ll need gloves to protect your hands from the heat and a heat-resistant work surface. I use mechanic’s gloves because they leave a lot of the tactile feedback that you loose with leather, and the workbench in my shop isn’t going to be hurt in any way by hot plastic.
Bending Cord
When you bend any kind of rigid tubing, it will try to kink at the bend. Acrylic, PETG, copper, steel, ABS plastic, PVC – all of them do it to some degree. It’s a product of geometry and physics.
When you bend a tube, the surface of the tube on the inside of the bend is compressed, while the surface on the outside is stretched. The tube doesn’t want to do this since it’s a lot easier to just fold over in a straight line – a kink.
To stop the kinking we have to have some kind of internal support for the tubing to help hold its shape. That’s where our bending cord comes in.
All bending cord for PC water cooling is made of silicone. It’s highly flexible, can be compressed to some degree and it’s highly resistant to heat. In fact, silicone doesn’t have a melting point. It will combust before it melts, but it won’t be affected at all by anything under 200° C – a temperature range we won’t get close to in this job.
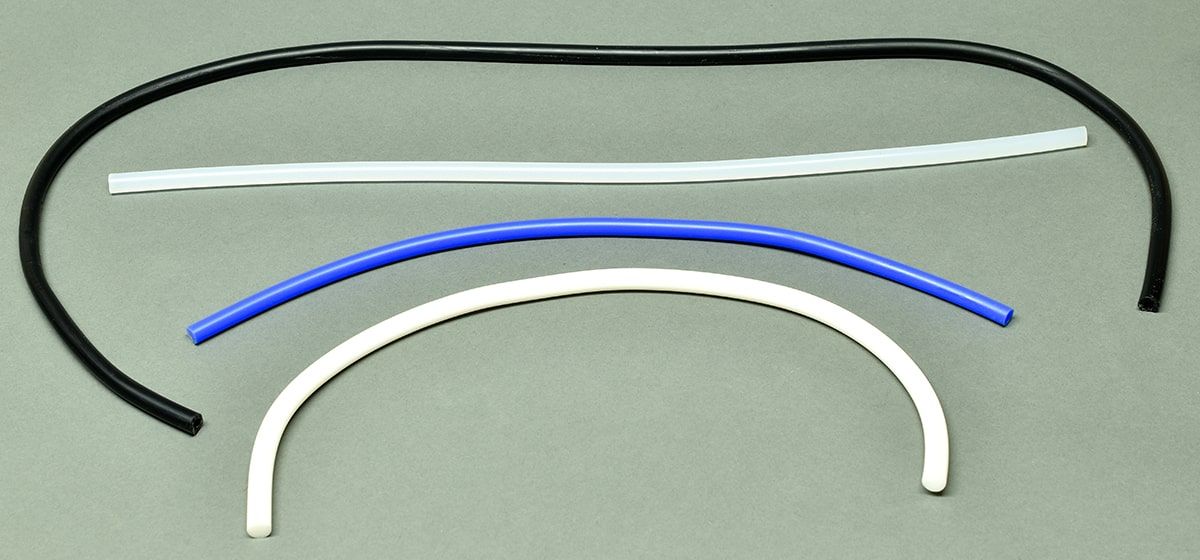
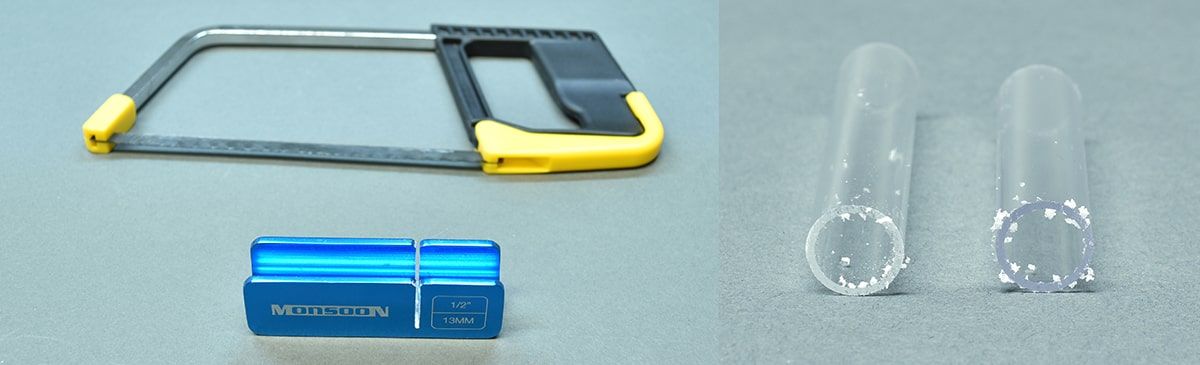
Size
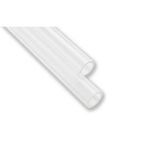
Like tubing, bending cord can vary in size.

The blue and the black cord here are from Monsoon and Primochill respectively and are made for tubing with a ½” inside diameter. Since ½” is 12.7mm it’s interesting that these cords are the smallest of the group.
If we put the cord inside our tubing there’s no visible difference between the two metric cords, but the ½” cords are visibly smaller.
So how small is too small? What kind of fit should you be looking for with your bending cord?
In a perfect world, your bending cord would fit in your tube with zero clearance, but since friction is a thing it has to be smaller. You want the fit on the cord to be as snug as possible while still sliding into the tube. The more space it fills up, the better it will support the tube in the process.
You can use one of these smaller cords with acrylic tubing without issue. Its rigidity helps hold its shape even when softened.
PETG is much less forgiving when it comes to support. Always use a bending cord that fits as snugly as possible with PETG.
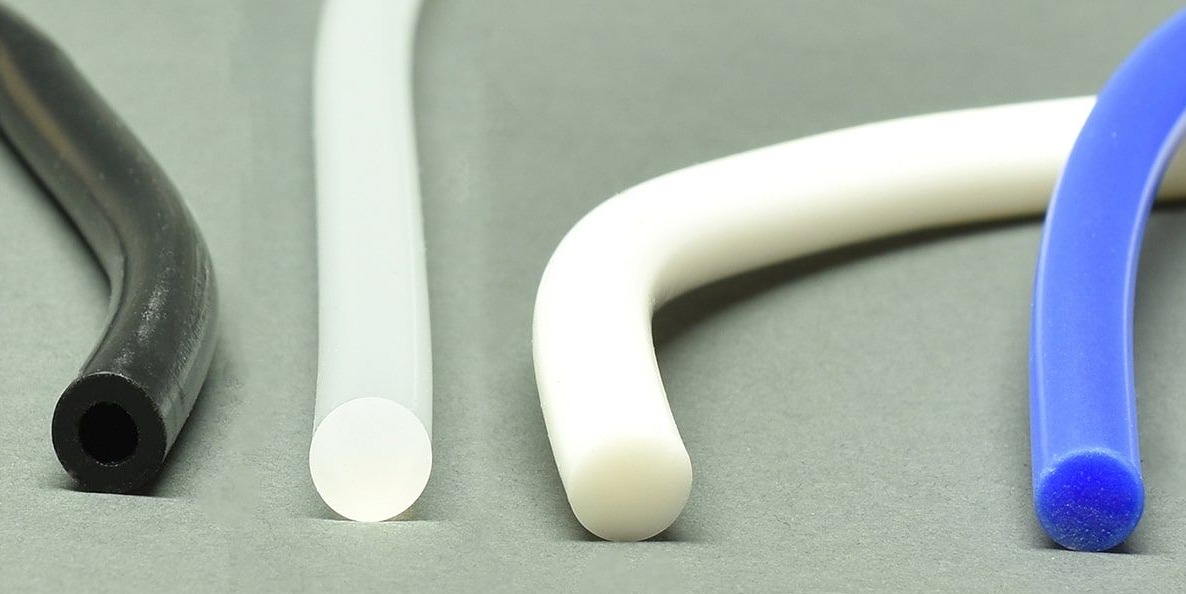
Solid or hollow?
You’ll notice one other difference in the cords – the Primochill cord is hollow. Does it make a difference?
Absolutely.
A solid cord will compress and deform less than a hollow cord, helping to support the tubing.
If you’re doing bends that require extra pressure on the tube for some reason, then a hollow cord can allow flat spots in the tube to show up at the point of pressure, but this is a special case as pressure like that isn’t needed for any sort of standard bends.
Hollow cords have a couple of advantages over solid cords also. They’re easier to install, and your tubing will heat up and cool down noticeably faster with a hollow cord. It has a lot less mass to absorb the heat you’re applying to the tube.
If you’re working with acrylic, you can choose which style works best for you.
ALWAYS use a solid bending cord for PETG. It’s simply too delicate in its softened form to use a hollow cord.
Color
We’ve got white, off-white, blue and black cords here. Does it make a difference?
Yep. White cords make it easier to see your marks when it’s time to bend your tube.
Lube
One thing you should never do is put your bending cord into your tube dry. Doing that is a good way to get your cord stuck. You need to use a lubricant of some kind.
When I first started bending rigid tubing I used olive oil to lube the cord, and it worked very well. The problem I had with it was making sure it was all out of the tube when the bending was done. Oil and water don’t mix, so it took a lot of shaking and soap and very hot water to get it done.
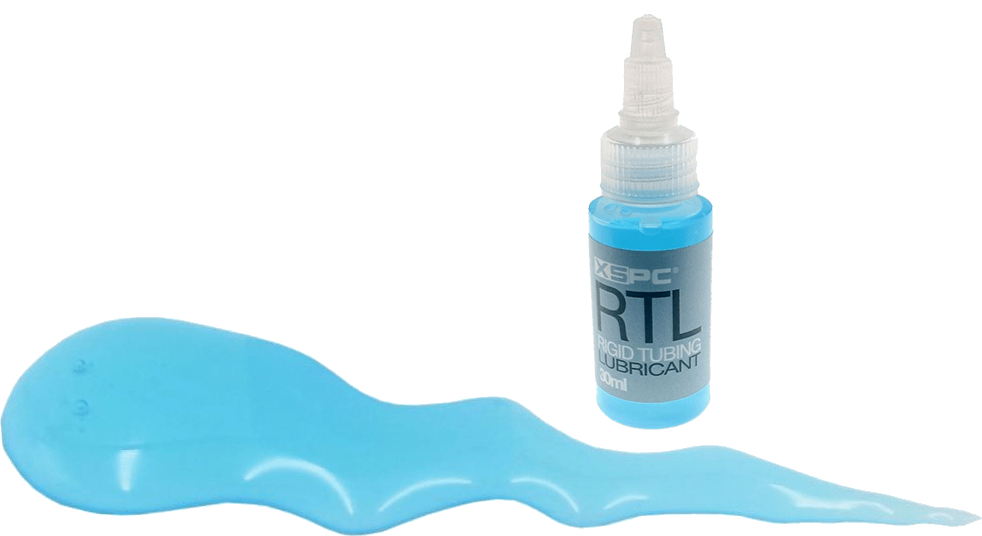
Today there are purpose-made lubricants for rigid tube bending – water-based compounds that are easy to rinse out when the job is done. Dishwashing soap works well also, and some of the best modders I know use nothing but hot water. You’ll figure out what you like best in time, but to start I suggest a purpose-made lubricant or dish soap.
Let’s Do This!
It’s time to bend the first tube (finally!). I decided to do the simplest bend in the system first – the run from the upper radiator to the front radiator. This is a simple single 90-degree bend.
I’ll be using a whole piece of tubing for it, but I’ll make my bend off-center so that there’s a some tubing left when I’m done – I should be able to make this attempt twice with a single piece of tube if I need to.
There’s a standard sequence to this process too.
Mark It
We need to make marks on the tube to show us where exactly to heat it and bend it. I prefer to mark the center of the bend and each end, then heat from the center and outward just past those end marks.
From our measurements, we know how long each side of the bend needs to be. Remember from the planning and measuring post that the straight legs of a right angle are longer than half of the arc inside that angle?
When it comes time to mark the tube just use the straight distance from the fitting to the center of the bend you measured as a MINIMUM length, and add a couple of inches to that for cutting at the end.
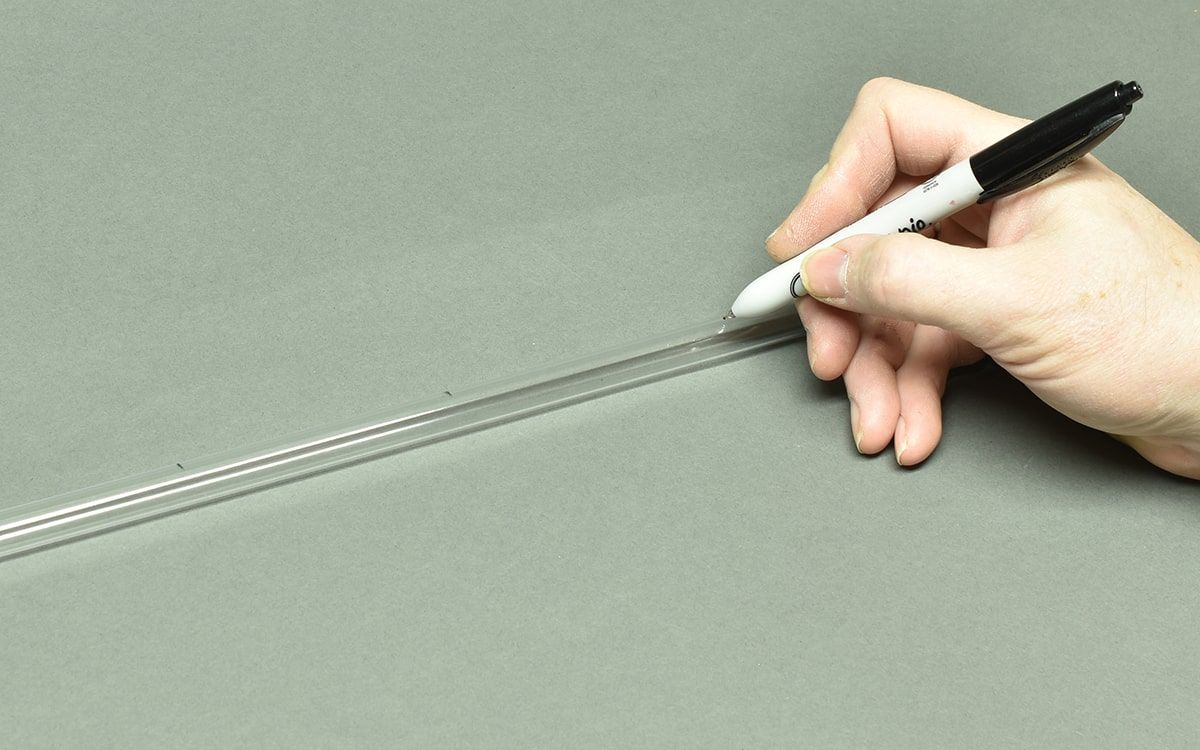
In this case, the horizontal run needs to be 44mm long. Measure 44 mm from the end of the tube, add 50mm to that for your straight extra and make a mark on the tubing with Sharpie. You can use pencil as it comes off a lot easier but I find Sharpie is a lot easier to see. This mark is the center of the bend and the initial heating point of the tube.
Place two more marks on the tube: one at each end of the length of the total bend. That length will vary based on the diameter of the bend, but you should have that number from the measuring phase.
Get It Hot!
While it would be possible to bend tubing with any heat source that’s hot enough, a heat gun is the ideal tool.
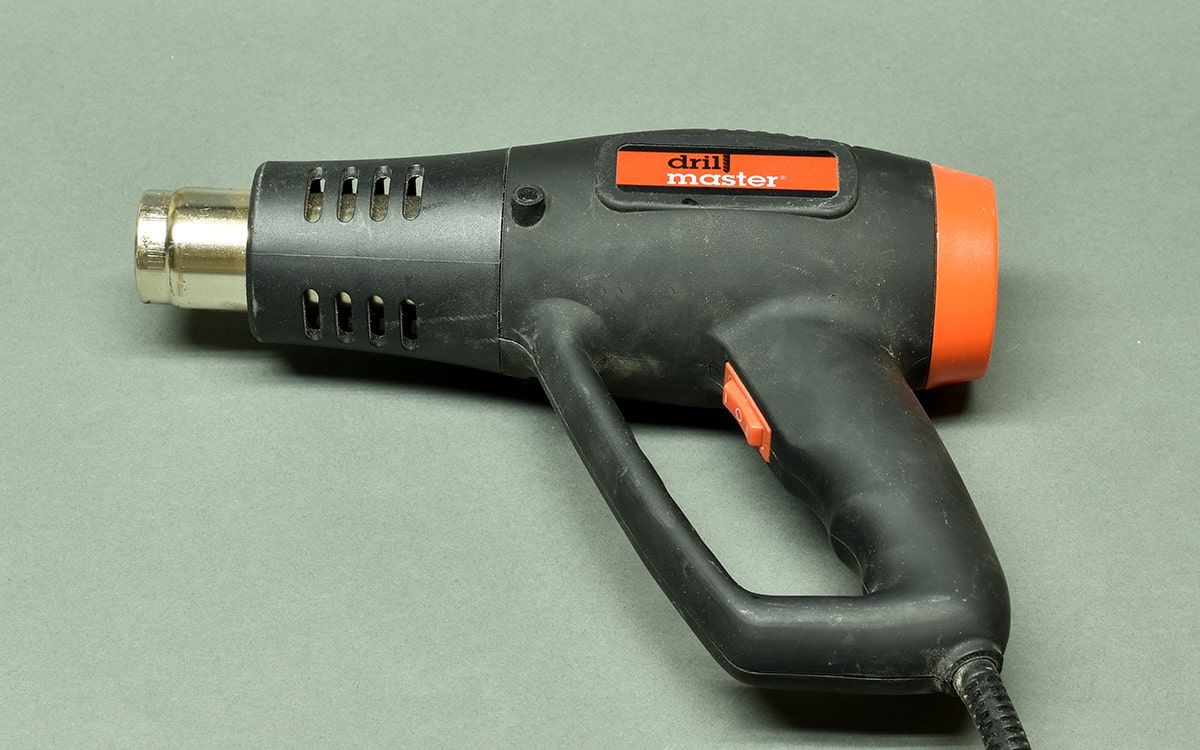
A good heat gun is designed to put off large amounts of heat evenly for long periods without damage, and will have a flat back area that will let you stand it up on its own during use. Some have a single heat setting, some have two, and some high-end guns have a digital temperature gauge and adjust to a wide range of temperatures.
My heat gun has two settings. I use the highest one for working with acrylic and the lowest for PETG.
Once the bending area is marked, add some lube to the cord (you can also add it to the inside of the tube) and slide it in past the furthest mark by a few inches.
A couple of things to keep in mind while you’re heating your tube:
- The material on the outside of a bend will have to stretch and deform more than the material on the inside. It’s best to heat everything uniformly, but if you’re going to apply more heat somewhere make it the outside of the bend.
- The sides of the bend should be heated also, but they will have the least stretch to make. In my experience, they get plenty of heat just from rotation and from heating the inside and outside of the bends.
- PETG and acrylic heat up VERY differently. You can overheat both, but it’s a lot easier with PETG.
Put on the gloves and fire up the heat gun. For acrylic I place the tubing about 3 inches from the tip of the gun. Working PETG I use 4 inches. You’ll have to practice with yours to get the distance right.
Be patient.
Start heating at the mark at the middle of your bend. Rotate the tube slowly there until you see the tube start to bend a little bit by itself. Once you see that you can start heating the tube to either side of your mark, working your way outward just past the other two marks on your tube.
Depending on your heat gun, your material and your bending cord, you’ll see this in anywhere from 30 seconds to 2 minutes.
Be patient.
This part takes some practice, so don’t worry about getting it wrong the first few times. Once the tube starts bending here, heat it on one side of the bend and then the other, slowly working across the length of tube between your marks.
Be patient.
PETG not only gets to its bending temp faster than acrylic, it gets there suddenly. Be very mindful of how it feels when you’re heating it.
Bending
Your tube will get *really* flexible by the time it’s time to bend it. Your first time doing this you’ll probably be surprised just how soft and pliable it gets.
As you’re heating and rotating the tube, you should be gently working it toward the shape you want. I find that I get cleaner bends when I bend the tube into my end shape slowly as I heat it.
Once it gets to the point that you can easily bend it to the shape you want it in your hands without it folding or wrinkling at the point of the bend, go ahead and bend it to its final shape.
If you’re bending freehand, just take the tube away from the heat and keep an eye on it while it cools. It’s pliable enough at this point to shift slightly out of shape if you’re not careful.
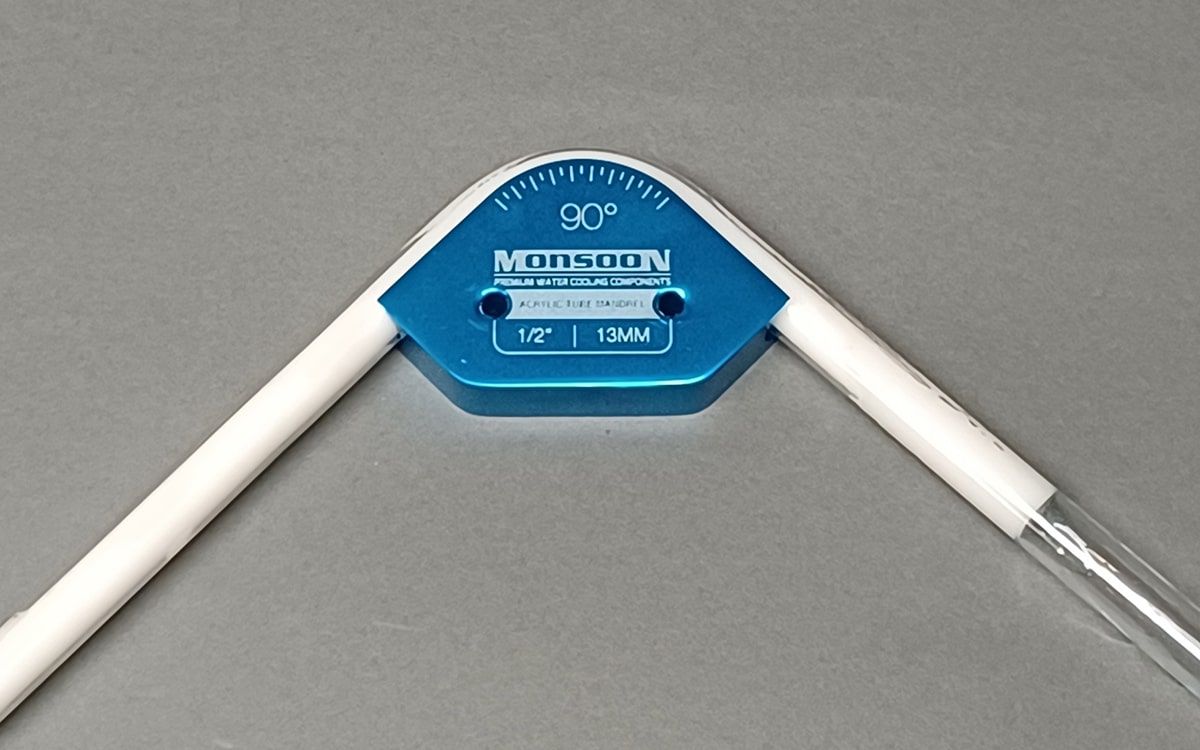
If you’re using a mandrel or a form, put your tubing there now and hold it in place for 30 seconds or so. *Don’t* put pressure on the side of the tube anywhere you’ve heated it, like trying to press it into the mandrel. It’s soft enough at this stage to flatten with your fingers. Tubing mandrels are round on the inside for this reason – so they don’t flatten one side of your tubing.
Cooling
I like to have a fan blowing on my workbench for this part, to help cool the tube down more quickly. Assuming that you’re done with the bends in this piece at this point, or if you need to inspect the bend closely, you can pull the bending cord out and your tube will cool down much faster.
Dipping the freshly-bent tube in water to cool it off is a bad idea, especially if it’s acrylic. The thermal shock is likely to shatter acrylic and distort PETG.
Once your tube is cooled you can inspect your bend. Here are a couple of things to look for:
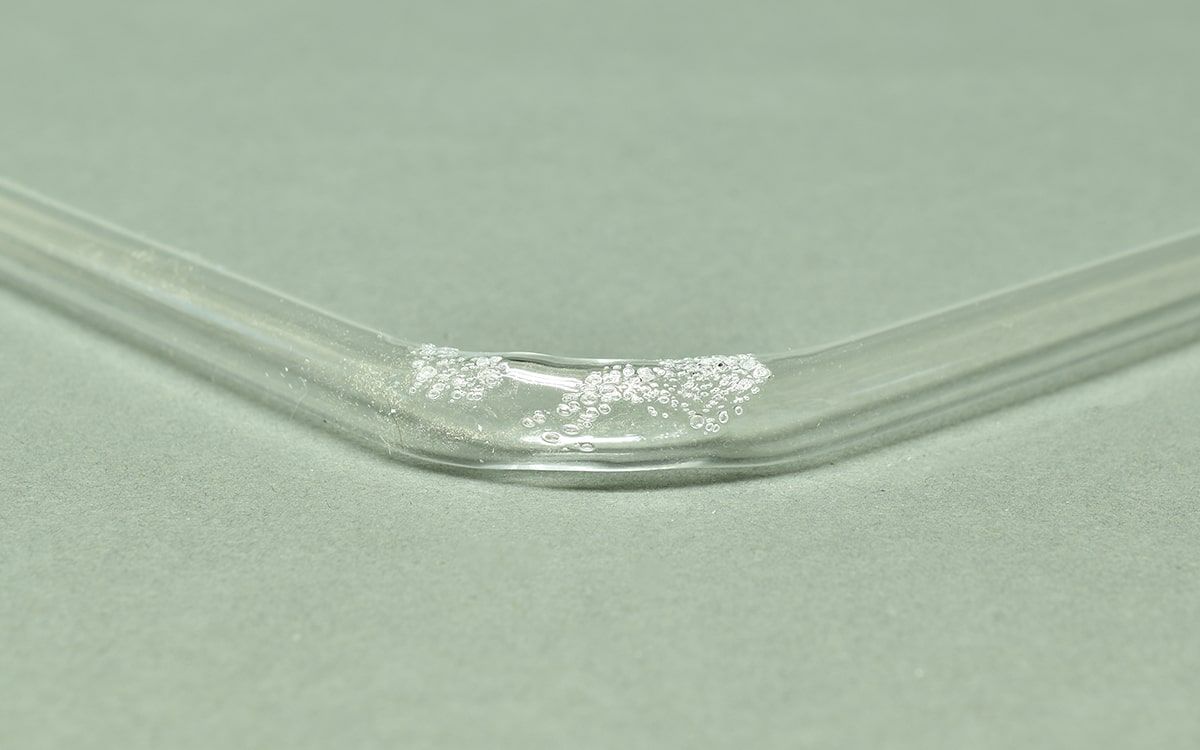
![]()
Overheating: Material was allowed to get too hot in this one spot. Keep your tubing moving and move it a little further from the heat.
Warping: Tubing was twisted when it was bent. This is very easy to do with the tube as pliable as it is at the bending stage. Practice keeping the parts of the tube in your hands straight without twisting.
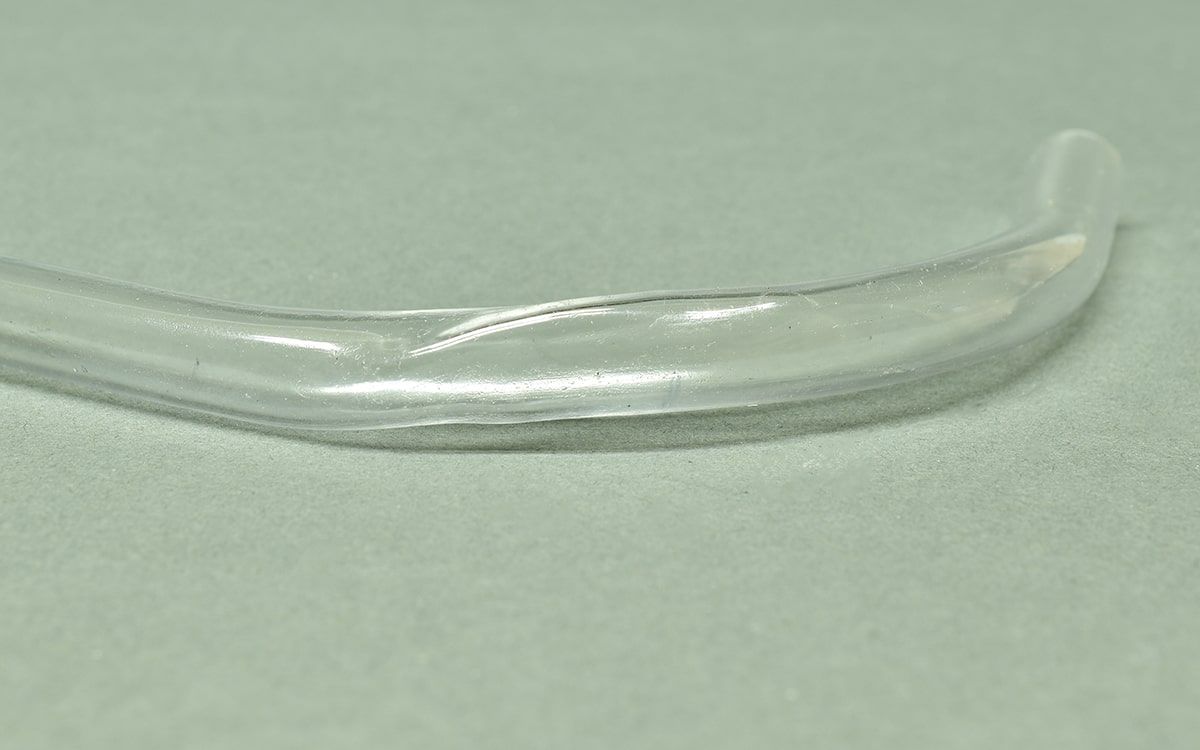
![]()
Stretching: Tubing was bent too far too soon. Heat it up longer and on both sides of the bend.

![]()
Springback: Tubing was turned loose from its bend before it was fully cooled – possibly also underheated. Make sure your tube is fully flexible before bending it – you should be able to bend it a little bit *past* the bend radius you want. Make sure it’s cooled to a solid state before releasing it.
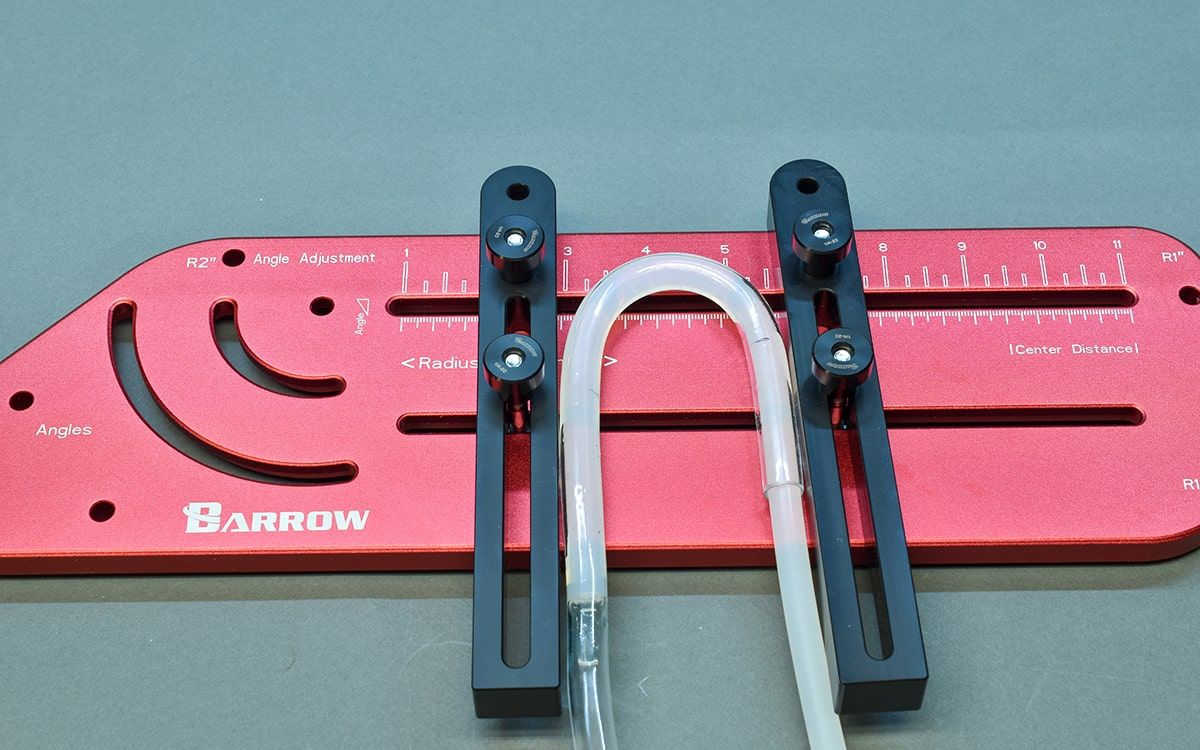
While bending forms are excellent tools, they are limiting. Out of the tools I’ve used, the Barrow jig is the most versatile, and even with it you’re limited to bends of a specific radius, which maxes out at an inch and a half.
What if you want to make a bend with a three-inch radius?
Remember that lots of things can be used as bending forms.
You can buy PVC unions at your local big box store up to 4 inches in diameter for a few dollars, and metal ducting connectors come in sizes up to sixteen inches.
If you do end up using something else as a form, remember that you’ll be bending your tube against a flat surface. Don’t apply any more pressure than absolutely necessary to hold the tube against the form to cool – unless you want the inside of your bend flattened. That’s an aesthetic choice.
Cutting
Once you have your tubing run bent to your liking, it’s time to cut it to length.
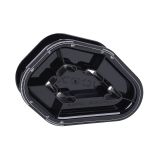
The four main ways to cut tubing are:
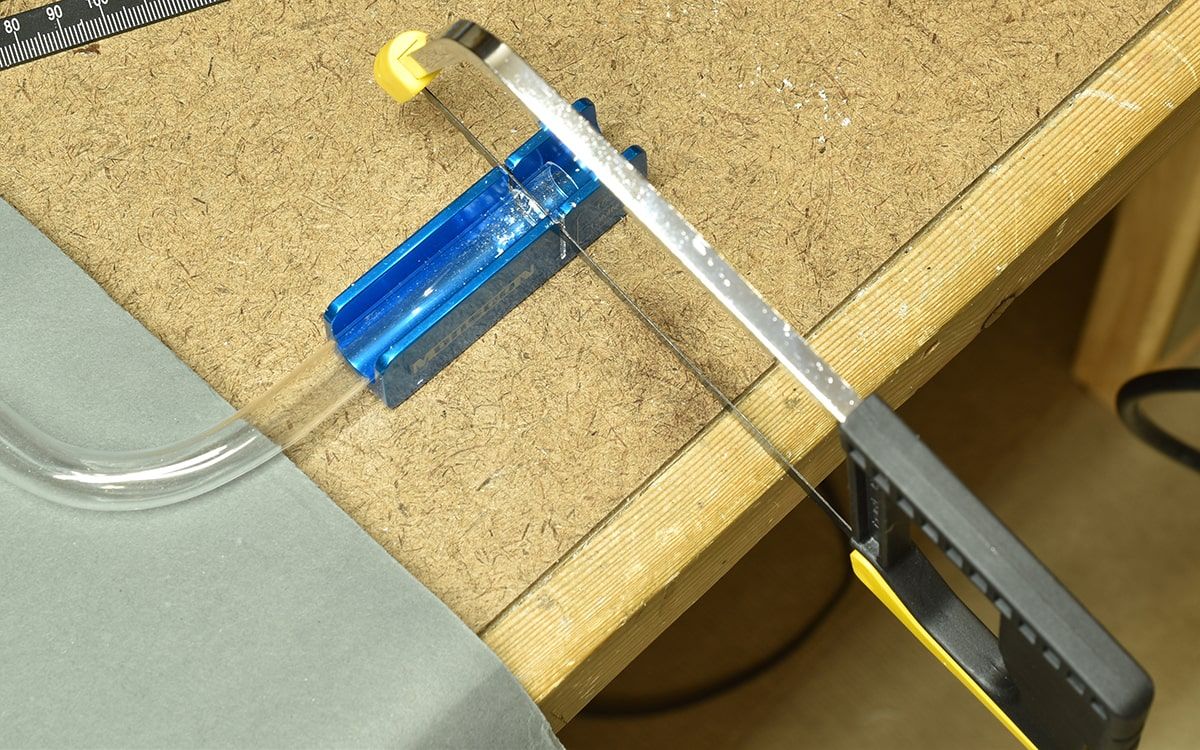
Hand saw – Any fine-toothed saw will do the job. Monsoon and Alphacool both offer a saw and cutting box.
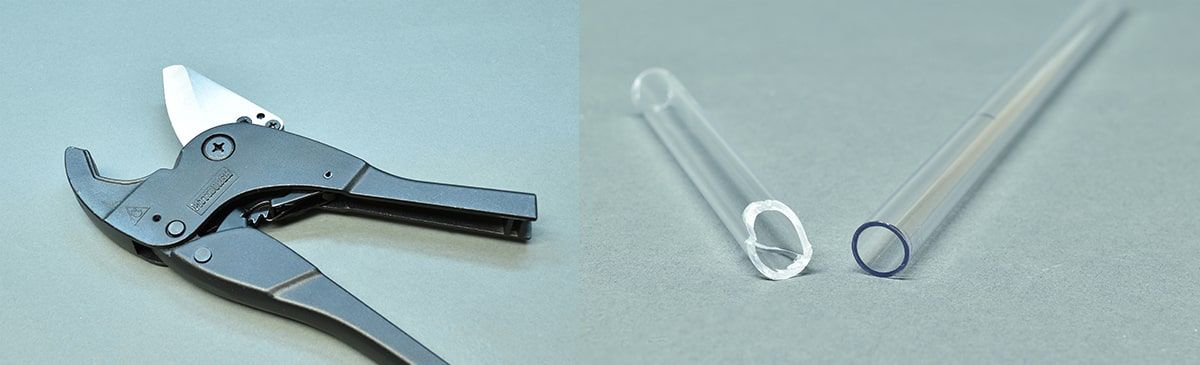
Ratcheting pipe cutter – Typically used for flexible or softer rigid tube like PVC, these will cut PETG very well with a little rotation at the beginning of the cut, but will shatter acrylic.
The rotation at the beginning of the cut in PETG is critical to get the blade to start cutting into the material before applying pressure. Without it this type of cutter can easily distort your tubing, making it impossible to get into a fitting.

Rotary pipe cutter – These are usually used for cutting thinner-walled soft metal pipes like copper. They are another good tool for cutting PETG and shattering acrylic.
Pressure has to be handled carefully on these with PETG – this cutter can also distort the shape of the tube.
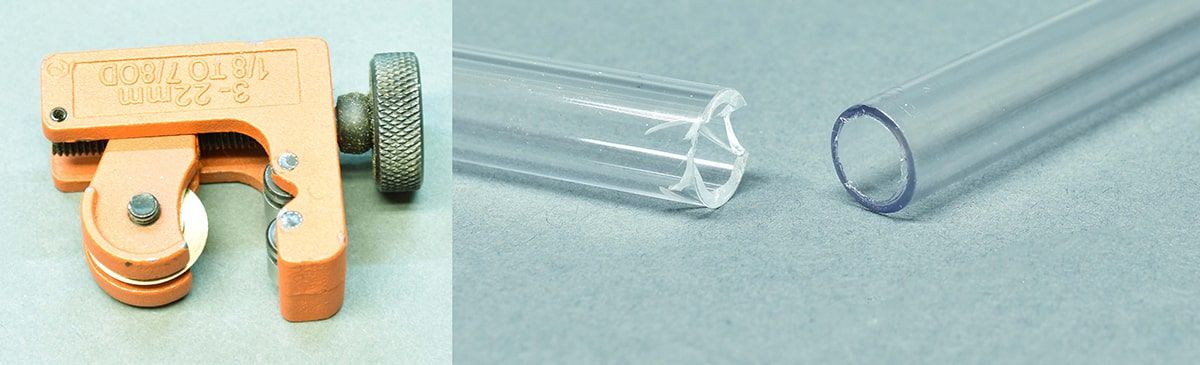
Table saw/miter saw – Power tools like these can make beautiful cuts in pretty much anything. The quality of the cut depends largely on the blade used. For our purposed a blade made for non-ferrous metals is ideal.
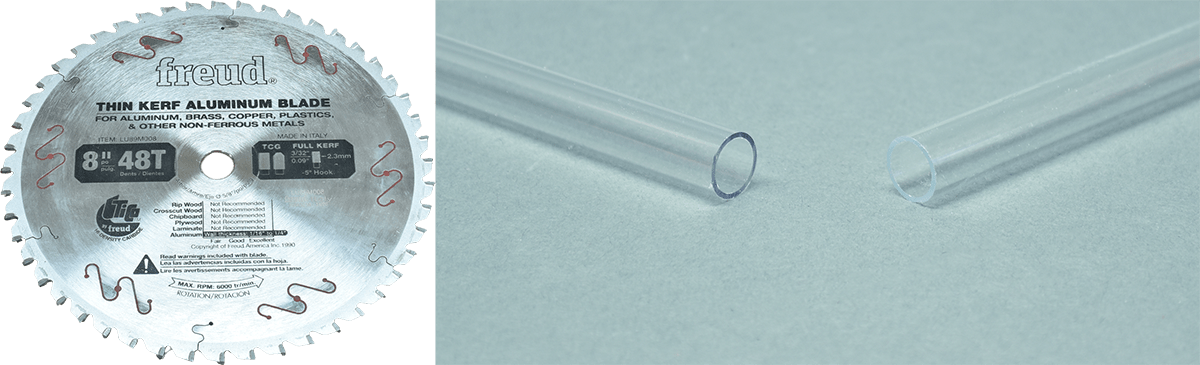
Which cutter is best? Like most things it’s a tradeoff. The power saw makes the cleanest cuts and is the easiest to use. It also costs exponentially more than the others
The two pipe cutters can’t be used on acrylic but are inexpensive and work well on PETG.
Personally I prefer the hand saw if I’m not working in my shop beside my table saw. A hand saw can be used on either type of tube, makes decent accurate cuts and it’s affordable.
Deburring / Chamfering
While the right tool will make a beautiful cut in either of the materials we’re working with, the cut ends of your tube will need more work before you can safely use them.
Cuts with a hand saw and sometimes with a power saw will leave debris stuck to the inner and outer edges of the tube. This has to be removed before it can be used.
Even in perfectly clean cuts, the edges of the tube are sharp and have to be angled (chamfered) to slide safely into your fittings without damaging the internal o-rings. The outer edges of that tubing is sharp.
There are a few tools made to accomplish this deburring/chamfering process.
Standard plumbing reamer – This tool has two sides, one for the inside of the tube and one for the outside. Provided the cutting edges are sharp this tool is excellent for acrylic. It will work on PETG also but it has to be used with very little pressure to avoid the blades digging into the softer material.
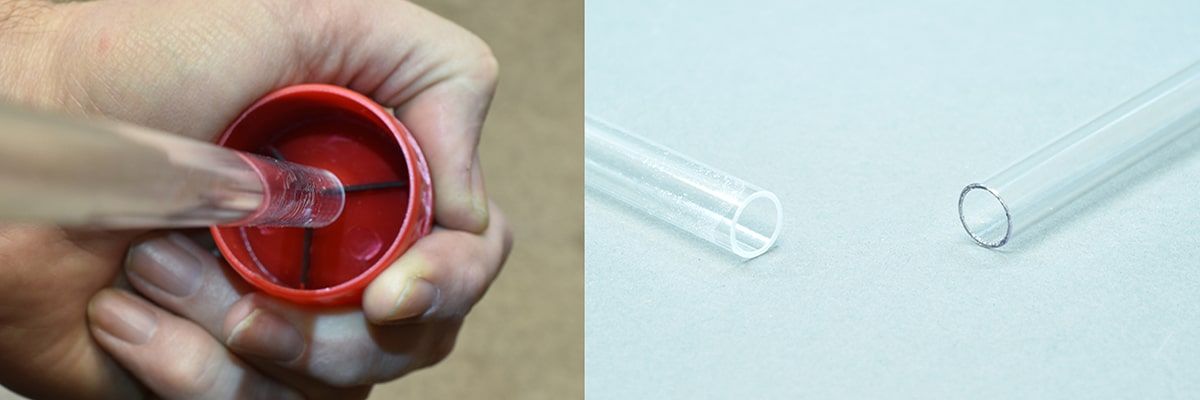
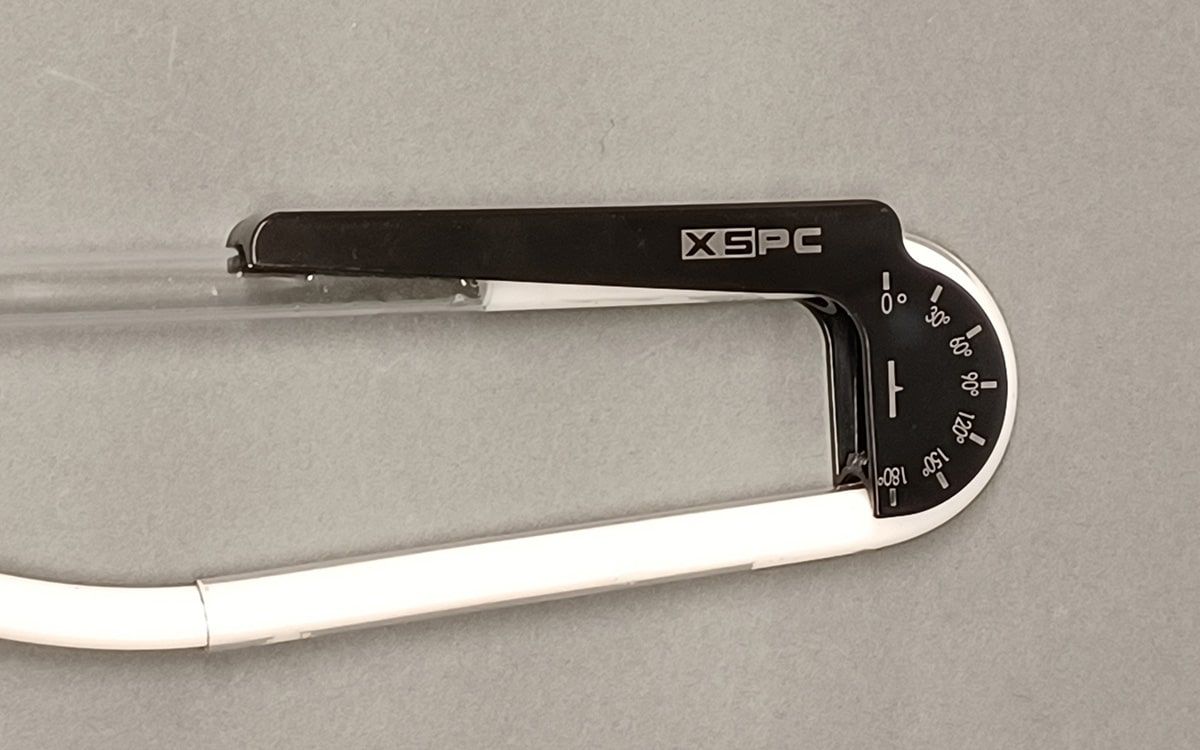
XSPC chamfering tool – Designed to be used in a power drill, this tool slides over the end of your tube and makes a chamfer on it just like the plumbing reamer – only faster. The cutting edges on this tool are purposefully dull. It will create a chamfer and then stop cutting - don’t try to use it to remove material, it will just get hot and melt the edge. This tool is suitable for both acrylic and PETG.
Note that the inside of the tube will still have to be cleaned out with a different tool.
Primochill chamfering bit – This tool is identical in its use to the XSPC tool, but the cutting edges on this one are very sharp and it cuts aggressively. So much so that I’ve taken to using it to shorten my tubing the last couple of millimeters needed for the perfect fit. It works very well for that but use light pressure with acrylic. I’ve managed to shatter acrylic tube with this tool with excessive force.
Unlike the XSPC tool, this tool’s curved cutting surface chamfers both the inside and outside of the edges, and as you can see below, it leaves near-perfect results.
Once all your tubing runs are bent, cut and chamfered to perfection, you’ll need to wash them well to get the lubricant and the shavings out of them.
After that it’s time to install them. This is one other area that PETG outperforms acrylic – ease of installation.
Getting the ends of your tubing into the fittings on either end can be a challenge. PETG will bend a small amount and snap back in place, allowing for easier installation in tight spots. Acrylic will bend very slightly, but it will shatter if it’s bent very far at all.
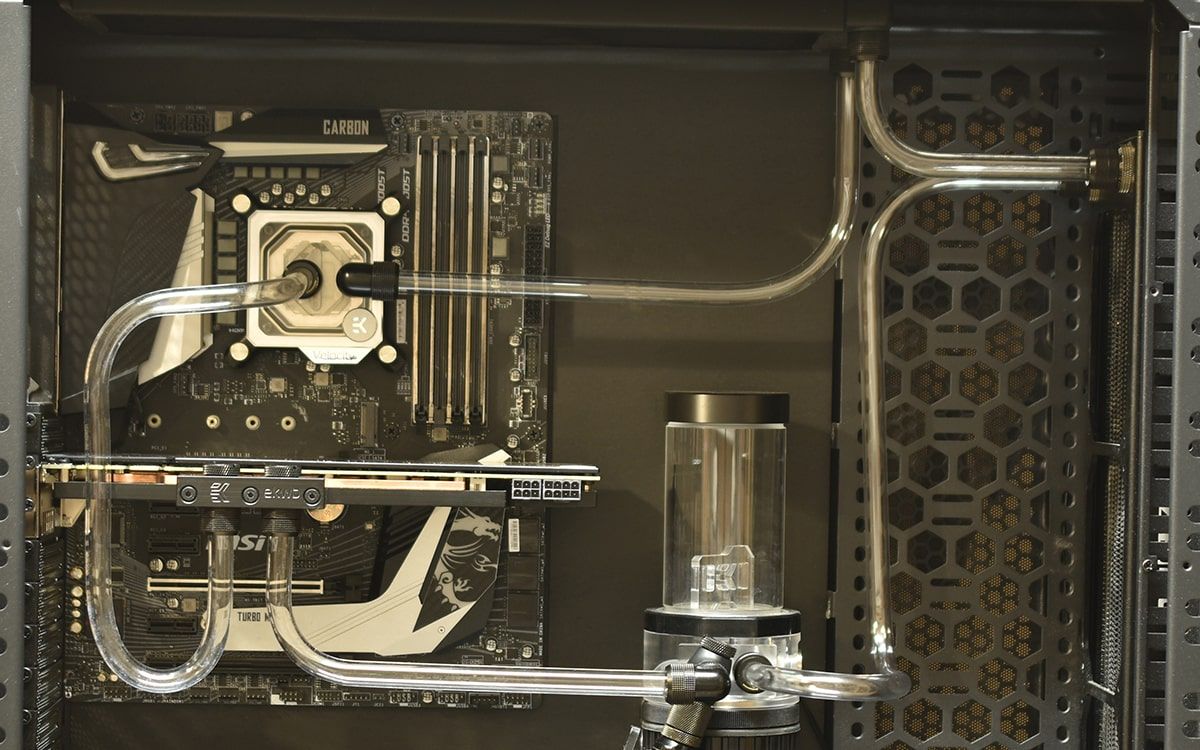
My loop
The loop I made for this post ended up having five pieces total. I used acrylic on four of them and PETG on the fifth.
This simple run is too long for its space – as it should be. Setting it in place and marking part of the tube that needs to be removed from either end will get us closer to the right length.
After cutting that part off the tube is still slightly long. That’s fine – this is a multi-step process that lets you whittle your final length down slowly until it’s perfect. Once I get to the point that the amount that needs to come off is too small to do it with the hand saw I’ll switch to the Primochill chamfering tool for the last couple of millimeters.
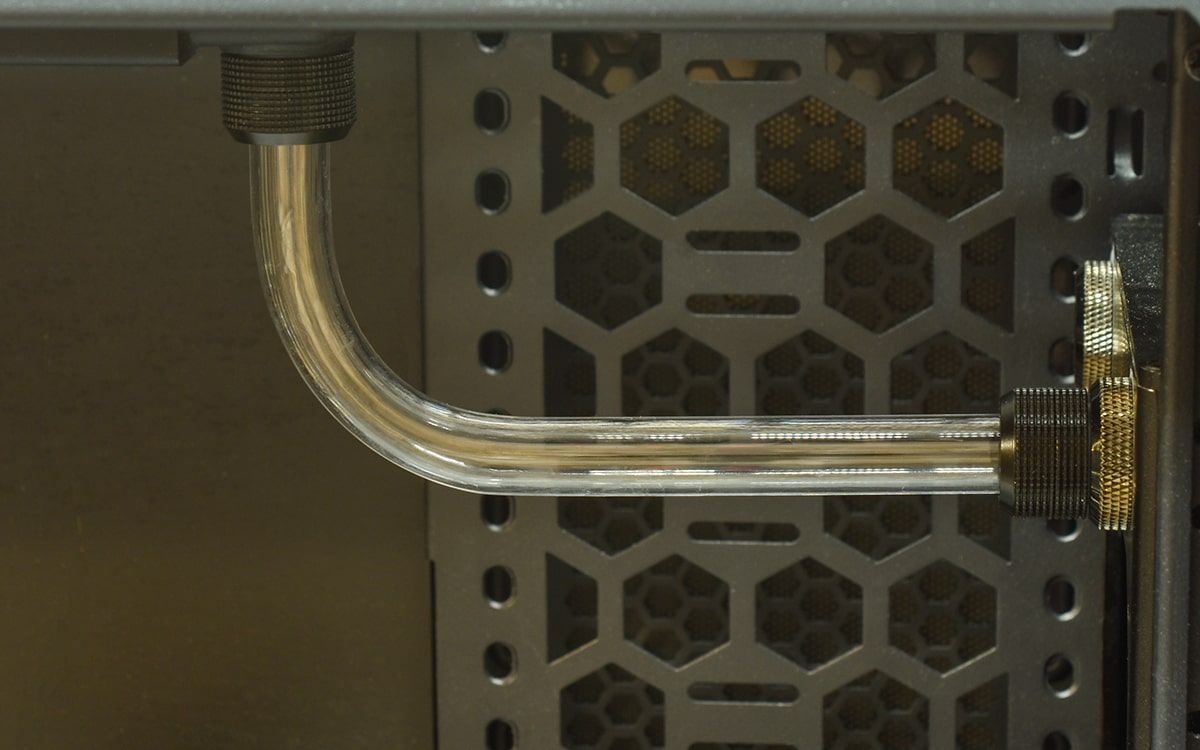
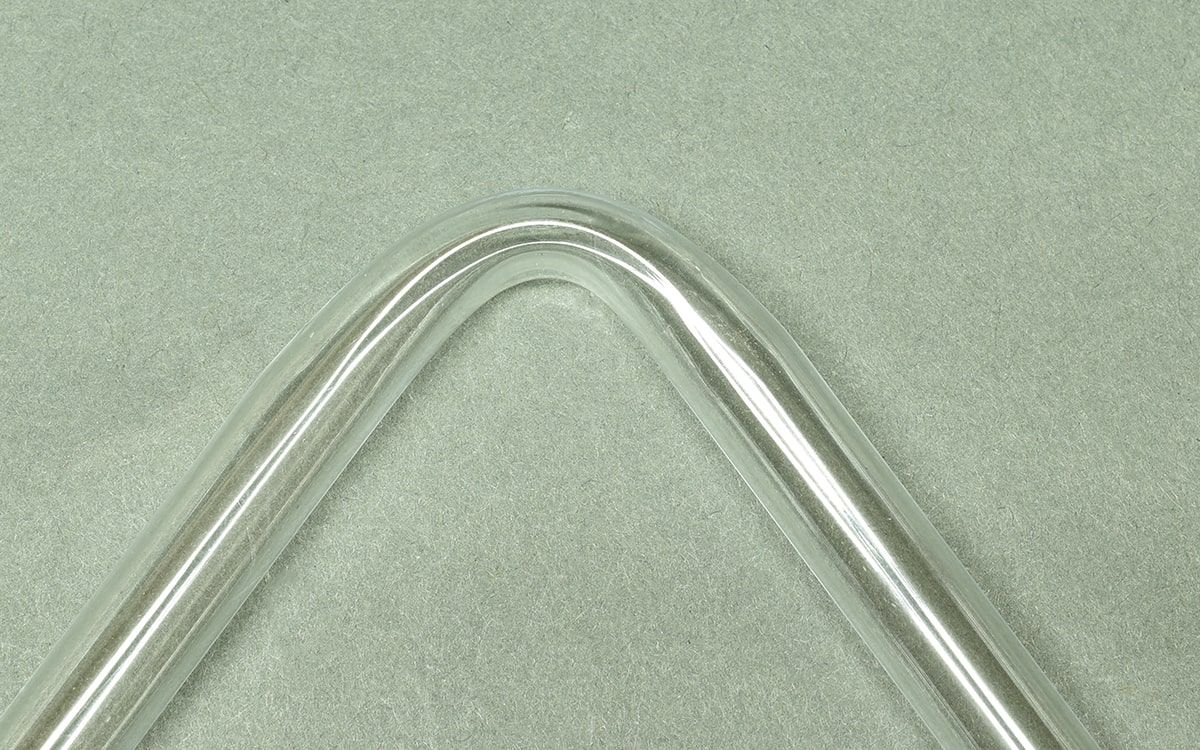
Perfect!
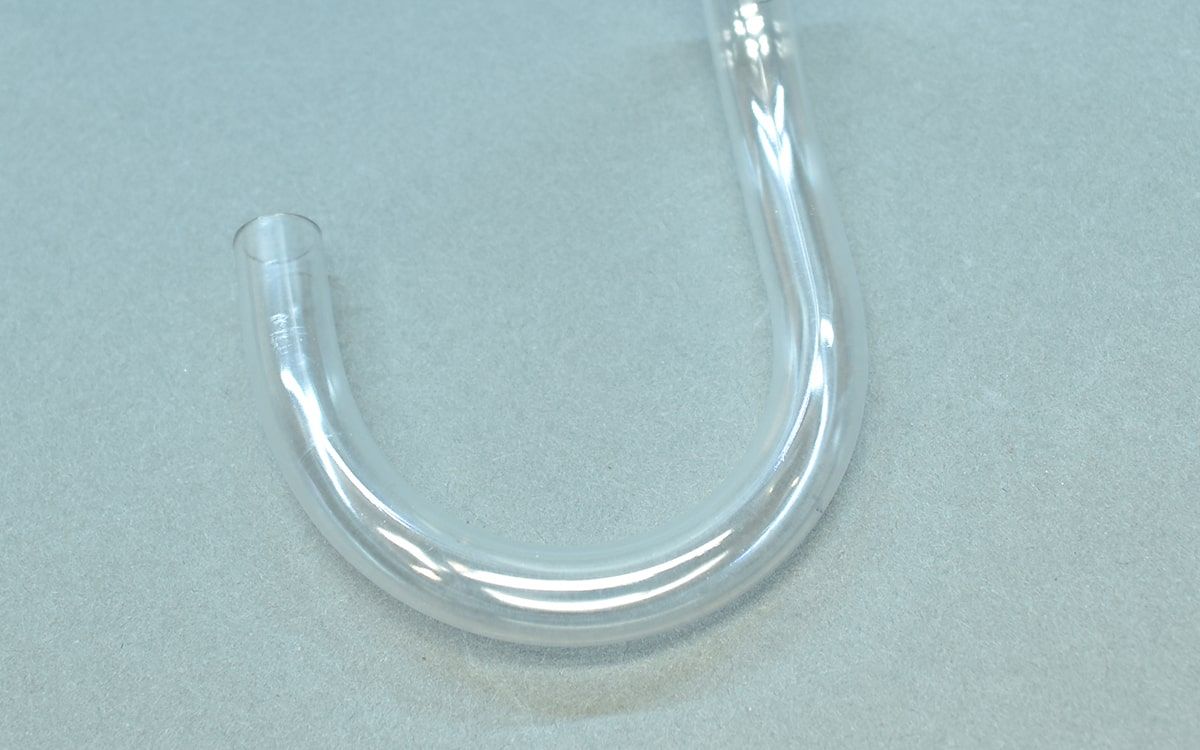
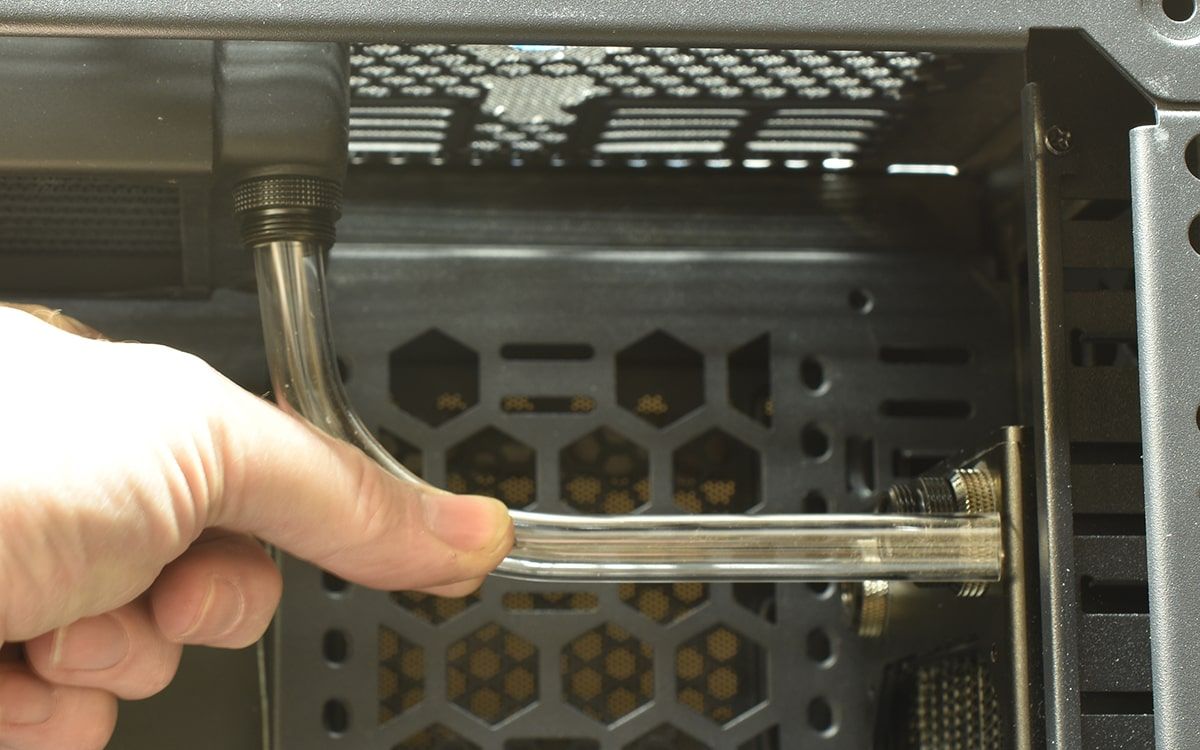
This is part of the front tubing run from the pump to the front radiator. It’s also the first time I’ve worked with PETG in years. Oddly enough, this 180-degree bend was the easy part. The two 90-degree bends further down the line were harder to get right until I got used to the material again.
Job done!
I hope your installation process goes as smoothly as mine did. With patience and care your measurements will be accurate, your cuts clean, your bends smooth and your chamfers gentle.
Enjoy your new water loop!
8 Comment(s)
Load more comments
Recent Posts