Get an Extra 30% off Clearance Items With Code SAVE30 (click here)
Five Mistakes New Water Coolers Make
November 29, 2021 4
Custom PC water cooling is a popular hobby, and getting more so lately. I see a lot of people showing off their new water cooling systems or asking questions about the basics – or both. These new members of the cult group are making some awesome stuff and I’m glad they’re here.
The thing about learning any new skill is the learning curve. Water cooling your PC doesn’t have to be difficult with the amount of information available at our fingertips. But like any new undertaking, mistakes will be made. It’s inevitable, and it’s how some of us learn best.
Today we’re going to look at five common mistakes that new water coolers make – well, one water cooler in particular, named John. You may know John. If not, stay in the hobby long enough and you’ll meet him.
Don’t be like John.

Result – Draining your system for maintenance or upgrades is time-consuming and messy. Frustration.
Scenario: John builds his dream PC complete with a full custom water loop. It’s a thing of beauty and makes him happy. Looking at it, listening to it and not hearing it, watching his system temperatures stay lower than he’s ever seen them – all of this make John happy. Life is good.
Six months pass and John decides to dutifully perform his bi-annual maintenance on his new water cooling system. Being dedicated to doing things right in his new hobby, he decides to replace the coolant altogether as part of his maintenance. He disconnects the nest of wires from the back of his PC and moves it to a table so he has room to work.
He looks at his PC in bewilderment – how is he supposed to get the coolant out of it??
A series of events follow. While they’re eventually successful in removing most of the coolant from John’s PC, it involves long periods of frustration, covers John’s table with bright red coolant and stains his carpets. John’s love affair with water cooling has come to an end.
Moral: A properly-installed drain valve will let you empty your coolant in a controlled manner and keep everything around it dry.
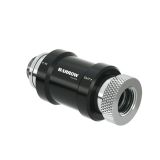
Protip – Even with a drain valve, draining your loop can be difficult and time-consuming if you don’t open the loop to the outside air. If air can’t get into the loop then water can’t leave. Cracking open a fitting or stop plug high in the loop (or on top of your reservoir if you have one there) will let air into the loop as the coolant is leaving and make the whole job easier. There are even dedicated manual vent fittings made for venting during draining or bleeding your system.

Result – Loss of performance over time, potential destruction of expensive parts. Sadness.
Scenario: John has built a new PC, and decided to try water cooling for the first time. While he was picking out his parts, he found a couple of radiators that were quite a bit cheaper than others the same size. Not really caring why, John opted to save some of his hard-earned cash and go with these. He installs his water cooling system, complete with a drain valve and plain distilled water (another cost-saving measure), and happily uses his PC for the next few months.
Little did John know that the reason those radiators were less expensive is because they’re made with aluminum cores instead of copper. Since aluminum is an excellent conductor of heat, John’s new PC is running at lower temperatures than he’s ever seen.
As the weeks roll by, John (being an attentive PC user and watching his stats closely) starts to notice that the temperatures he’s been used to seeing are beginning to get higher. John chalks it up to warmer room temps in summer and moves on.
As things get worse, John decides a complete teardown is in order to find the cause of his worsening temperatures. At the end he disassembles his CPU water block - what greets him inside will haunt him forever. His GPU block is no better.
Inside both of his blocks, the metal has corroded into a crumbling useless mess. Where finely-crafted microfins once channeled coolant there is now only a roughly square grainy hole decorated in the black and green remains of copper oxide.
John sits down with what remains of his beloved water cooling loop and begins the grieving process.
Moral: When you build a water cooling system, use parts that are either all copper (nickel-plated or bare) and brass *OR* all aluminum. Never mix the two.
Protip – Even the metals that play well together have some potential for galvanic action. It’s always a good idea to use an anti-corrosive additive in your coolant. All of the major brands available today already add these to their pre-made coolants, but if you opt to use a different fluid be sure it has an additive like this or add your own.

Result – poorly cooling performance. Dissatisfaction.
Scenario: John has had a good PC for quite a while. It was high-end when he made it but it’s firmly in the midrange now. Still, he enjoys it and has no plans to replace it any time soon. He just wishes it wasn’t so loud. With sixteen fans blowing at full blast he’s got no choice but the wear headphones to use it. At least he doesn’t have to try to understand his girlfriend over the fan noise any more. She left after the argument about the noisy PC.
John looks into custom water cooling to quiet his PC down. He decides to go all in and build his own custom loop. He does some reading on the topic, orders all his parts from Titan Rig and sets about waiting for them to arrive.
He doesn’t have to wait long since the company he bought them from is amazing. Once his parts arrive he puts his new cooling system together, complete with a drain valve and all-copper water blocks. He sets it back up in its place and loads up Grand Theft Auto: V.
The noise is much better at first. John smiles in his near-silence, but it only lasts a few minutes. As he wanders Los Santos, he notices that his PC is getting louder. Within twenty minutes it sounds almost as bad as it did before! John jumps out of his game and checks his temperatures – they’re HIGH! Higher than he’s ever seen them!
With his temperatures inexplicably well into the danger zone on his FX 8350 CPU and both of his R290X video cards, he stares questioningly at the single 120mm radiator he’s installed and decides that water cooling a PC is a waste of money.
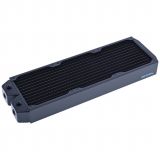
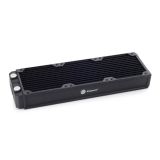
Moral: Radiator space is the single largest deciding factor in how well your water cooling system works. The rule of thumb on how much radiator space you needed used to be one 120mm unit per water block plus one unit. So, if you were cooling only your CPU for instance you’d want a minimum of 240mm of cooling space (120mm for the CPU + 120mm).
That rule doesn’t apply any more. Today’s high-end hardware is hotter than ever. My personal formula for minimum radiator space is 140mm of space per water block, plus 240mm. My rule on how much radiator to use has always been simple: as much as possible. While it is possible to have too much radiator space, it’s hard to do. Most modern PC cases won’t hold enough radiators to add up to “too much”.
Protip – Space isn’t the only consideration when choosing radiators. Thickness, fin count and restriction are all factors to consider. There’s plenty of information and reviews online, do your research before making a selection.

Result – A mess, potential destruction of expensive parts. Anger and regret.
Scenario: John is building his first custom water cooling loop. He’s done his research and chosen all the right parts: a drain valve, all copper components, and three 240mm radiators – more than enough to cool the loads he has. He spends an evening putting it all together, and when he’s done sits back and admires his new creation. He is proud.
John reconnects his PC on his desk and starts streaming a movie. No need to strain the thing right off the bat. He turns off the lights, sits back and settles in. The movie starts out very well – life is good.
Suddenly out of nowhere his monitor flickers violently and simply dies. All the millions of lovely dancing pixels he’s enjoyed for so long are snuffed out in an instant. John sits bolt upright just as a terrible crackling sound comes from his PC! He sees light flash inside through the gaps around the side panel and panics. Throwing on the light, he slaps the kill switch on the power supply and steps back.
John is too late. Smoke is drifting out of the upper vents in the PC, through one of his newly-installed radiators. Coolant is pooled on his desk around the PC, running off of the edge and staining his carpet.
Opening the side panel with shaky hands, John sees that one of the tubes he had connected to his upper radiator has come off completely. Not realizing the catastrophe that had happened, his pump had kept dutifully moving fluid as it was designed to, spraying it all over the inside of his PC, covering his graphics card and running down into the power supply at the bottom. It’s a horrific scene of technological suicide.
The images of that scene keep John from sleeping for some time to come.
Moral: When you finish assembling your new water cooling loop, fill it with water. Not the expensive premade coolant you bought – plain distilled water. Fill it, bleed it, put blue shop towels under everything and power up the pump. ONLY the pump. Let the pump run to circulate the coolant and put all of your new work under the same stress it will see in use. This is the time to find leaks, not when you’re using it.
How long do you leak test it? The standard answer is 24 hours, but it’s really up to you. Personally I don’t have that kind of patience, so I typically run it for 2-3 hours. If it doesn’t leak a drop in that time I call it good, drain the water, fill it with coolant and put it in service. In seventeen years of water cooling I’ve had two leaks. Your mileage may vary.
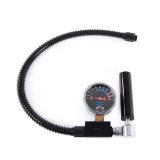
Protip – You can leak test your system without ever putting liquid in it. Alphacool, EKWB, Barrow and Aquacomputer all offer air-based leak testers. Connect it to your completed system, pump air into your loop to pressurize it and watch a gauge attached to it to see if it holds pressure.

Result – An incomplete water cooling loop. Frustration. Delays.
Scenario: John needs a new PC for work. His current PC is too slow and won’t run the latest software that he wants to use. He’s got a client he needs to impress to land a contract, and he needs to get a proposal to them in just a few of days.
John has also decided that he wants to make his new PC water-cooled and put it in a case with a big side window so he can put it on display. He’s got time for that, and when else will he have the chance to try it?
John puts his list of PC parts together – he's built those before. It takes a while longer to put together his list of parts for the water cooling system, but he manages and places his order with a company called Titan Rig – from what he’s read, they seem to be pretty awesome. ;)
His water cooling parts all arrive, but he’s limited to looking them over and reading the paperwork that came with them since his PC parts came from somewhere else and won’t there for a few days.
By the time his PC parts arrive, John’s proposal is due in two days. He builds his PC in record time and dives into his water cooling build.
Radiators, pump/reservoir combo, water blocks, drain valve – installing all the major parts goes smoothly. Time to put the tubing on and fill it up!
John cuts a section of tubing for his first run. He pulls a compression fitting from the large pile he purchased, removes the locking ring and presses the end of the tubing onto the barb.
It doesn’t move.
Applying more force, John tries pushing the tube onto the fitting in a twisting motion. It turns but goes no further onto the barb. Confused, John gets some 3-in-1 oil from the junk drawer in his kitchen and adds a little bit to the surface of the barb.
Even with this slippery aid, the tubing will NOT slide onto the barb to complete the connection. John is very confused.
Grabbing the compression ring he removed earlier, John slides it onto the tube.
The ring slides onto the tube, slides to the other end and clatters to the floor. It’s far too big for the diameter of his tube. Looking incredulously at the traitorous compression ring on his floor, John doesn’t understand. He’s using flexible tubing and fittings for flexible tubing – why won’t it fit?
John looks at the pile of tubing and fittings that he purchased and all he can see is his new contract slipping away…
Moral: Tubing (both flexible and rigid) comes in a lot of different sizes. You *have* to make sure that the fittings you buy match the size and type if tubing you’re using.
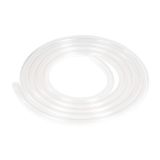
Flexible tubing is measured on both its inside diameter (ID) and outside diameter (OD). Rigid tubing is measured only on it’s OD. That’s why when you’re looking at flexible tubing and fittings you’ll see two measurements, like 3/8” – 5/8” or 13mm – 19mm. The first is the ID and the second is the OD. The exception to this is barb fittings. Since those don’t contact the outside of the tube at all, they’re measured only by the ID. Make sure your fittings match the size of your tube!
Note that while both flexible tubing and rigid tubing use compression fittings, they are not interchangeable. Flexible tube fittings only work with flexible tube, and rigid tube fittings only work with rigid tube.
Protip – When possible, it’s best to use tubing and fittings from the same brand. While the numbers may be identical between two brands, the actual sizes can vary slightly. Matching brands is the best way to ensure a proper fit.
John has learned a lot. He may have moved back to the noise and higher temps of air cooling by now - we’ll never know.
The best way to learn from a mistake is to learn from someone else’s mistakes. I hope we can all learn something from John.
4 Comment(s)
Load more comments
Recent Posts