Get an Extra 30% off Clearance Items With Code SAVE30 (click here)
PC Guides - How To Install A Memory Water Block
November 01, 2021
RAM water blocks are a point of some contention in the water cooling world. Most will tell you that they offer no practical benefit, while others can give you evidence of being able to achieve higher stable speeds with the more efficient cooling a water block provides. Many people choose to use them regardless of their practical application – they just look awesome. We won’t get into that discussion, but if you’re one of the many people that choose to install a water cooling block on your system memory we’re going to show you how to do it.
IMPORTANT: Very few RAM water blocks on the market today actually come with the heat spreaders that are needed to mount the block to the RAM – those are a separate purchase. Be sure that you have one heat spreader for each RAM module that you want to cool, and that your water block is large enough to cover all of them.
Off With The Old
Most enthusiast-level RAM these days comes with a heat spreader of some kind. A lot of them come with RGB also. Step one in installing your new RAM block is to strip it down to the bare PCB.
While there are too many lighting options out there to go over each individually, most of them are built onto the heat spreader and will come off with it. Check first for any obvious removal methods like tiny screws and see if the LED modules will come off separately.
WARNING: The heat spreaders on today’s ram are typically held in place with a thermally-conductive adhesive of some kind, and it is entirely possible to damage or destroy a RAM module while removing these factory cooling options. The same is true of all water cooling though. Water coolers as a group aren’t known to be timid when it comes to our precious electronics.
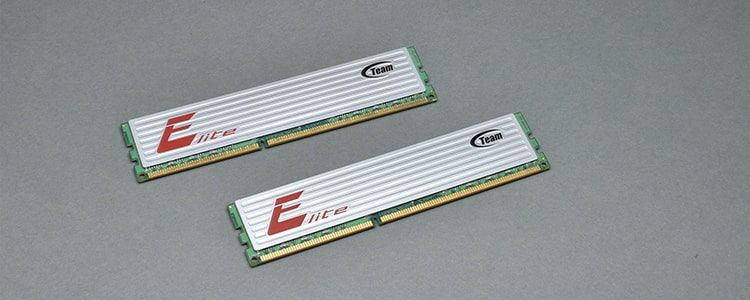
I’m using some DDR3 modules from Elite Team that I had on the I-Have-To-Keep-This-Because-I-Might-Need-It-Someday Shelf (right next to three modules of Kingston DDR2 and a single bare anonymous DDR module), but as long as the heat sink isn’t held on mechanically (with screws), the process will be the same.
The best way to remove factory heat sinks that are held in place with adhesive is heat. A heat gun is best but a hair dryer will do as well. Almost all adhesives soften when they get warm, so heating the heat spreader will heat the glue and make it more pliable.
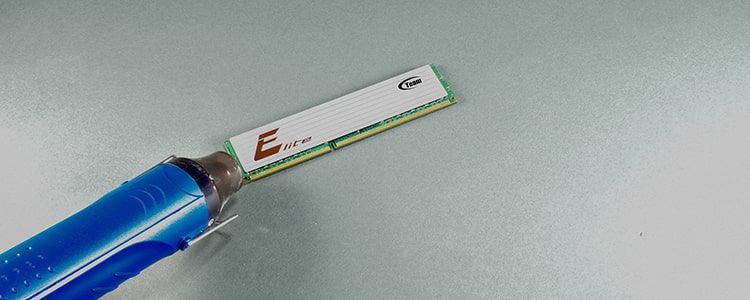
Applying heat from the side will help more of it to get under the heat spreader and should speed the process.
Once one area of the heat spreader is warm to the touch, lift up on the bottom edge and see if it moves. If not, heat it some more. Today’s RAM can handle temperatures up to 85C (185F) without damage, so it will have to be *very* hot to the touch to worry.
Once you get the glue hot enough, the edge of the heat sink will start to move a little. If you’re not able to lift it off of the PCB by hand, you can use a little mechanical leverage in the form of a thin slotted screwdriver.

WARNING! (Yes, another one) When using this technique, NEVER pry downward onto the PCB or the chips mounted to it. That includes twisting the screwdriver. Slide it in with the flat side parallel to the memory chips and LIFT upward only. As soon as you can get a good grip with your fingers, set the tool aside.
CLEANING IT UP
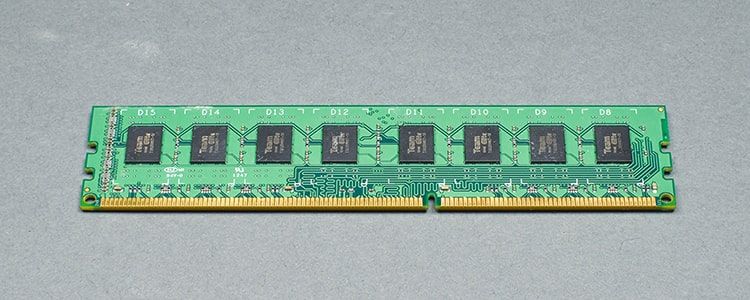
Once the heat spreader it removed, there will be leftover adhesive on the memory chips. This is best removed with a product called Goo Gone, but a high-purity isopropyl alcohol will work also. If you use Goo Gone, you’ll need to clean off the residue it leaves behind with alcohol also.
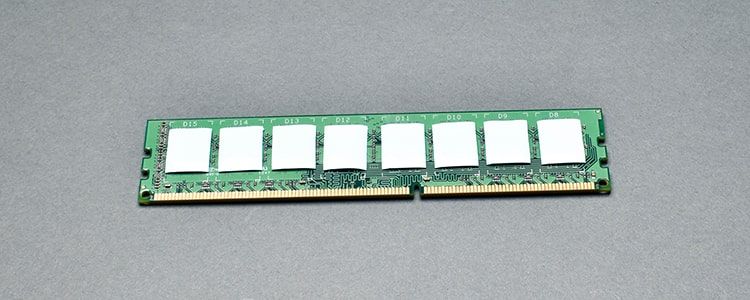
Once both sides of the module are cleaned up, you’re ready to start adding the new hardware.
For this article we’re using EK’s Monarch memory block and heat spreaders, but the process will be identical or at least very similar in any brand.
On With The New
Like any heat sink, the RAM block heat spreaders need an intermediate material between them and the part they’re cooling. EK’s Monarch spreaders come with individual thermal pads for each of the memory chips.
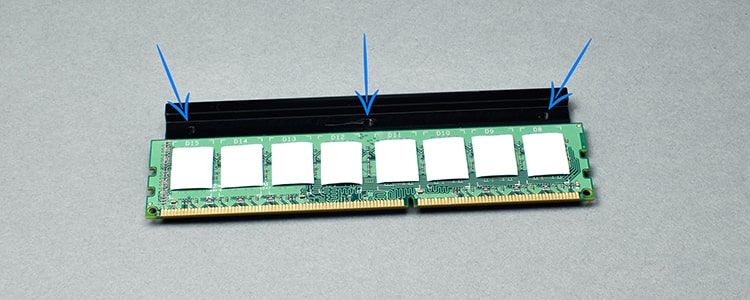
Once you have the thermal pads on all of the memory chips (both sides for double-sided modules), take a look at the two-piece heat spreaders. One piece will have female threaded holes in it. Lay that piece on your work surface with the holes upward and lay your memory module on top of it, with the top edge of the module against the upper lip of the heat spreader, as shown here.
Then take the other piece of the set at lay it on top of the assembly. Line up the screw holes on each half and secure them together.
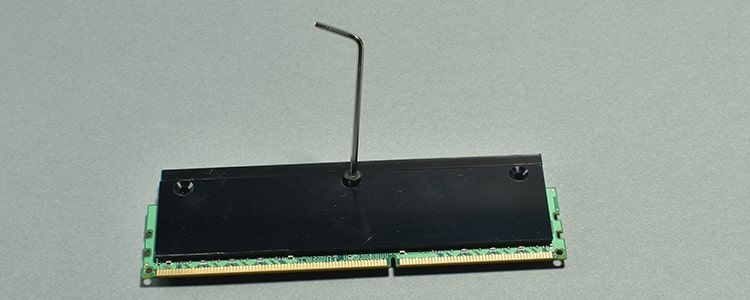
Note that at this point you should have two kinds of screws – countersunk screws like the one above with a tapered head, and button-head screws with a round head also. Use the tapered-head screws for the heat spreaders. The others are there for mounting the block to the assembly.
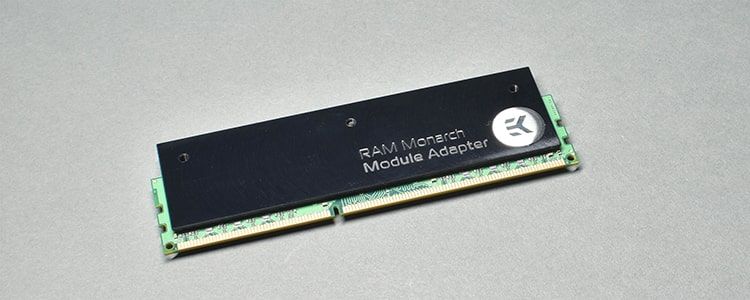
The finished assembly looks like this:
Mounting The Block
Once you have the heat sinks mounted on all of the your memory chips, install them into your motherboard. This is a good time to check and make sure all of the RAM modules are fully inserted into the heat sinks, with the tops of the PCBs resting against the upper lip of the heat sink:

If these aren’t fully inserted, the tops of the heat spreaders won’t be in line with one another and bad things can happen when the block is installed and tightened down.
Once the RAM is installed in the motherboard, another thermal interface material will need to be placed along the top edge of each heat sink. EK’s set includes these, but if whatever parts you have doesn’t have them, standard thermal grease can be used sparingly.

At this point it’s time to finally install your water block. Simply lay it on top of your memory modules, line up the mounting slots on the block with the screw holes on top of the heat spreaders and install the button-head screws that came with it.

Once those are tightened, your block installation is complete and you can continue with your loop assembly.
NOTE: Since the mounting slots are on the outside edges of the water block you can install your fittings prior to installing the block if it makes things easier.
When you’re finished, be sure to put the old heat spreaders and any accompanying LED hardware on that shelf I mentioned earlier. You never know when you might need it!
Recent Posts